Deploying SQL scripts from staging server to production server was always a nightmare, if not handled properly. I remember, we used to keep scripts in a respective folder and number them in order not to miss any scripts for the deployment, as you know that if a single script is missed from deployment, it is a BOOM.
SQL Server Schema compare extension is one of the best extensions in Azure Data Studio when it comes to comparing & deploying SQL script changes from staging to production database. In other words, you can compare and deploy scripts between any two databases. This extension reduced SQL script migration effort from days to just few minutes only.
Let me create development & production databases’ scripts to demonstrate the functionality of SQL Server Schema compare extension in detail.
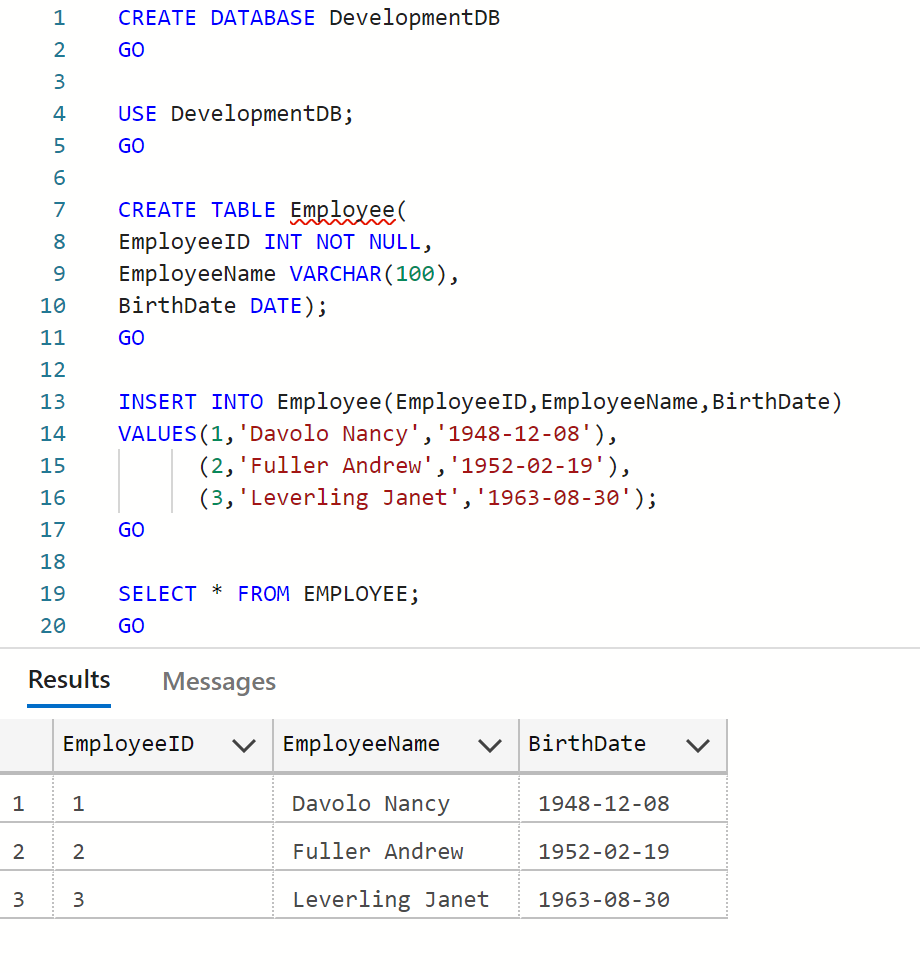
--Creating development database
CREATE DATABASE DevelopmentDB
GO

USE DevelopmentDB
GO
--Creating employee table
CREATE TABLE Employee(
EmployeeID INT NOT NULL,
EmployeeName VARCHAR(100),
BirthDate DATE);
GO
--Inserting data in employee table
INSERT INTO Employee(EmployeeID,EmployeeName,BirthDate)
VALUES(1,'Davolo Nancy','1948-12-08'),
      (2,'Fuller Andrew','1952-02-19'),
      (3,'Leverling Janet','1963-08-30');
GO

SELECT * FROM EMPLOYEE;
GO
--OUTPUT
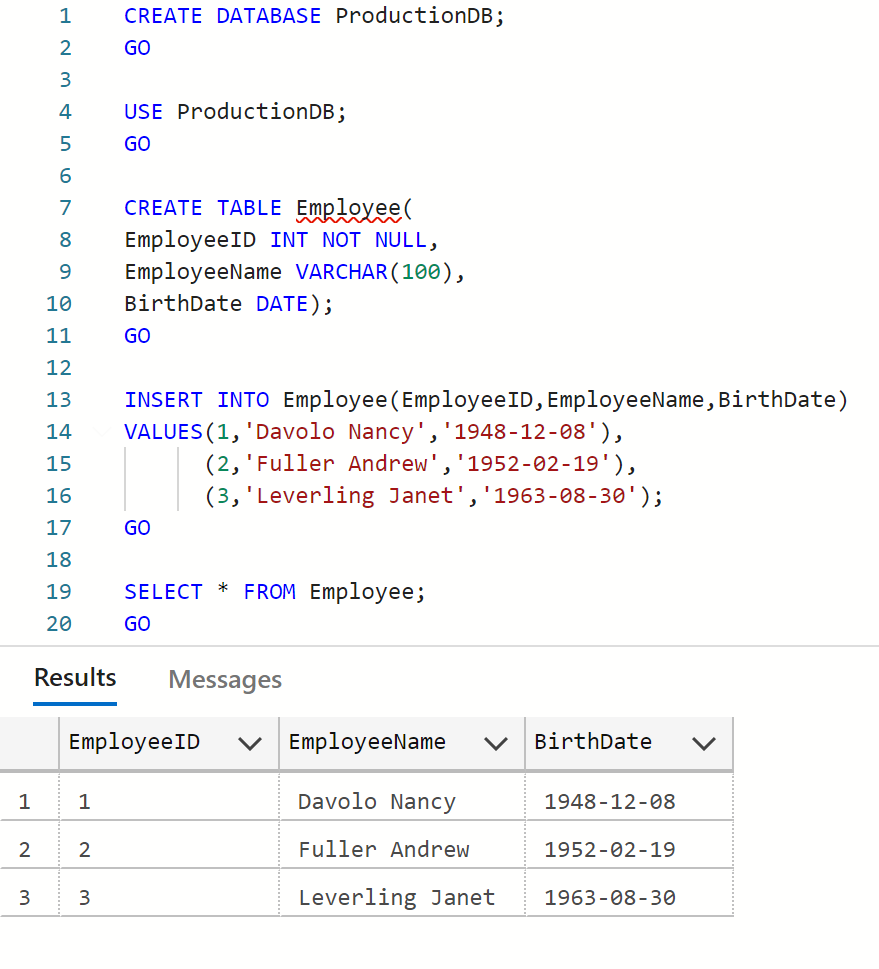
--Creating production database
CREATE DATABASE ProductionDB
GO

USE ProductionDB
GO
--Creating employee table
CREATE TABLE Employee(
EmployeeID INT NOT NULL,
EmployeeName VARCHAR(100),
BirthDate DATE);
GO
--Inserting data in employee table
INSERT INTO Employee(EmployeeID,EmployeeName,BirthDate)
VALUES(1,'Davolo Nancy','1948-12-08'),
      (2,'Fuller Andrew','1952-02-19'),
      (3,'Leverling Janet','1963-08-30');
GO

SELECT * FROM Employee;
GO
--OUTPUT
Let’s install the extension first in few simple steps. I found the installation pretty straightforward.
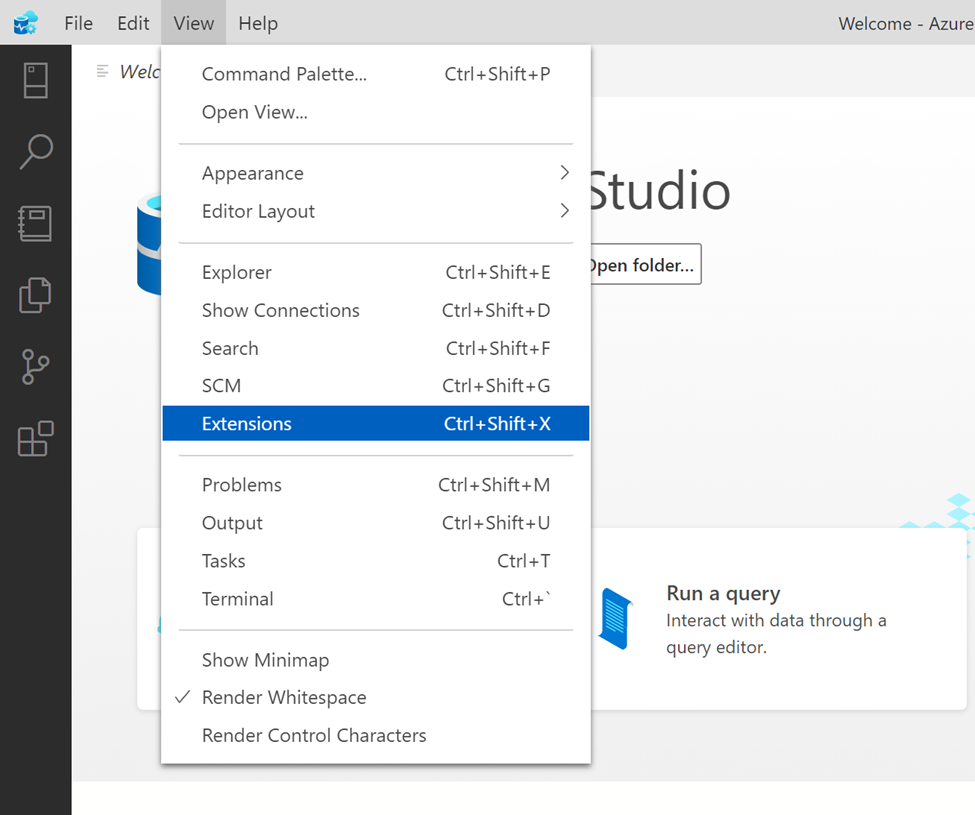
Step 1:
You need to open Azure Data Studio, then click on View menu and then click on Extensions or use shortcut CTRL+SHIFT+X as shown below.
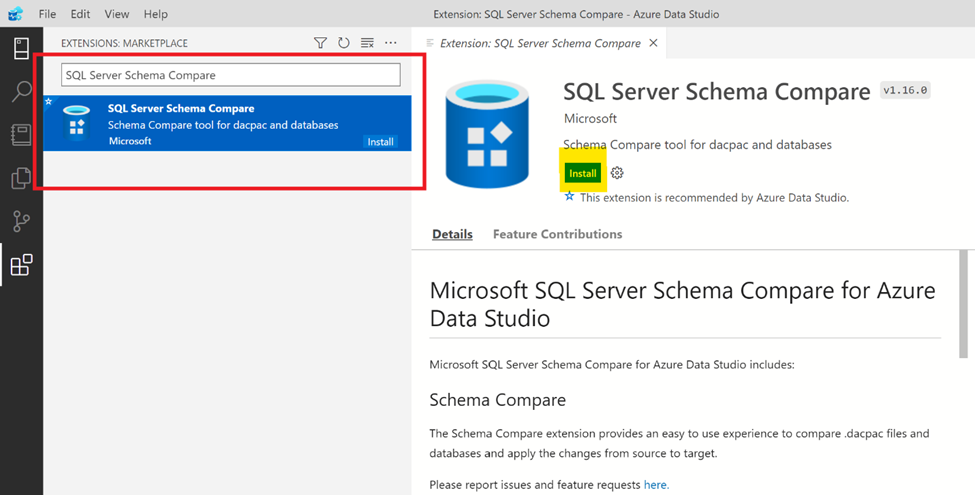
Step 2:
This will open Extensions Marketplace window where you can search SQL Server Schema Compare extension and install it by clicking Install button as shown below.
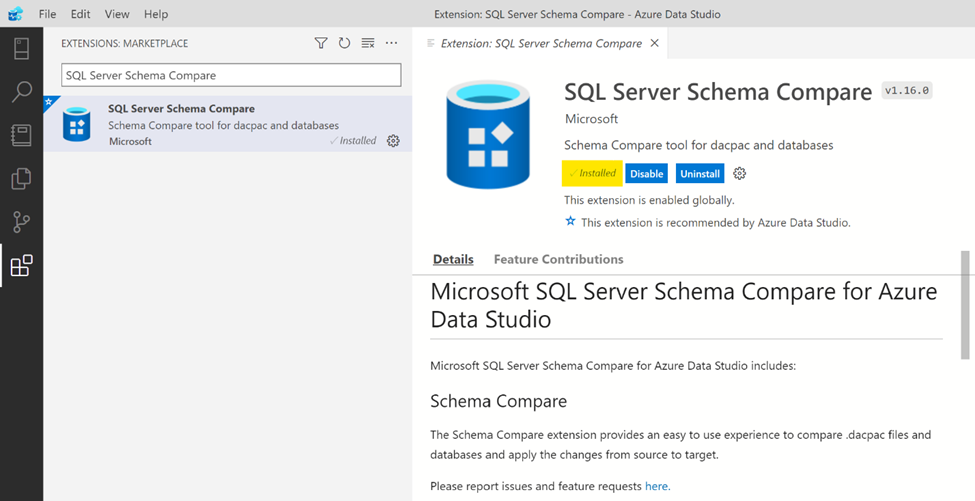
Step 3:
As we can see SQL Server Schema Compare extension is installed now and it is ready to use.
Let’s configure SQL Server Schema Compare extension step by step.
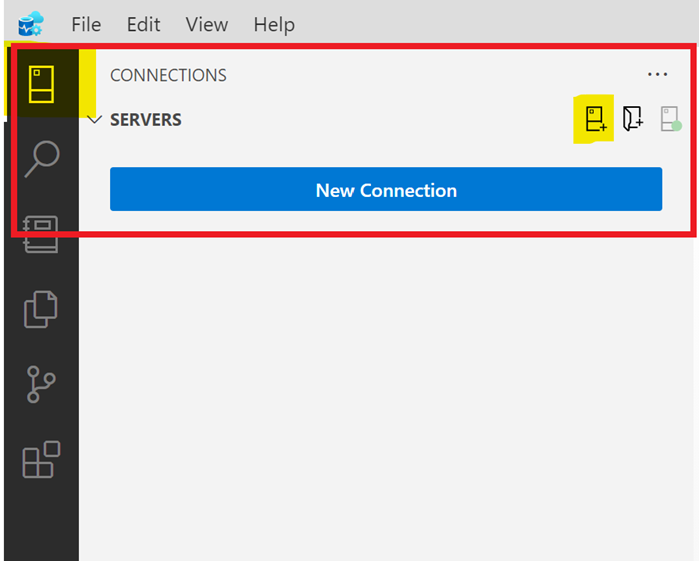
Step 1:
The first step is to connect to the SQL server instance which databases we need to compare. Let’s click on top left toolbar named Connections then click on New Connection button as shown below:
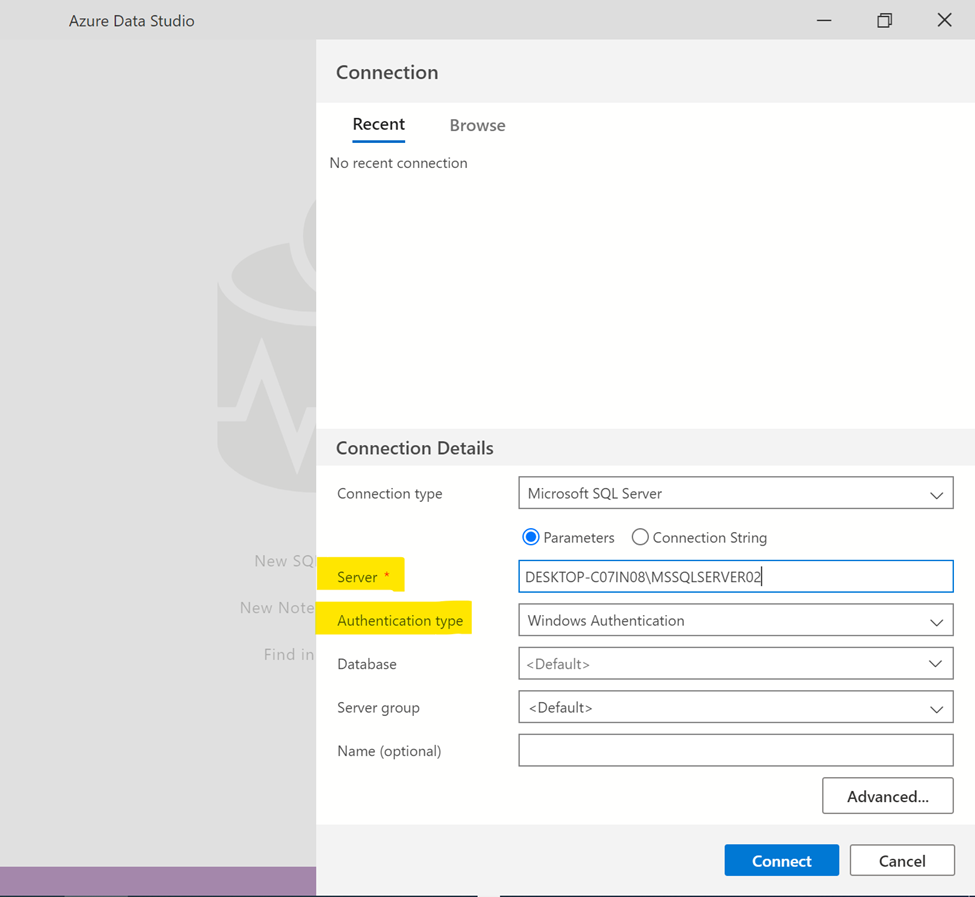
Step 2:
Now, SQL Server new connection window will open up and then you can fill the Server Name / IP address and Authentication type. I will connect via Windows Authentication in this step but you can also connect via SQL Server Authentication by providing user name and password then press Connect button to connect to respective SQL Server as shown below.
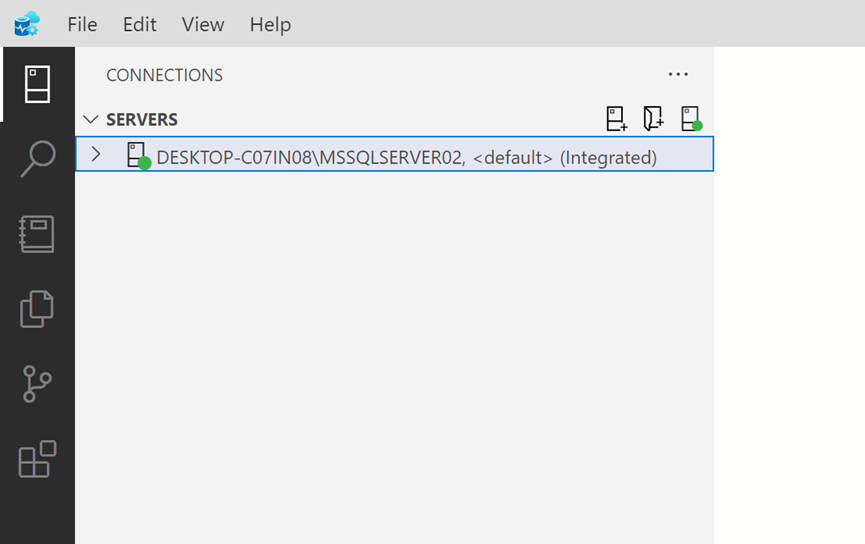
Step 3:
As you can see below, the respective SQL Server is connected and configuration is completed.
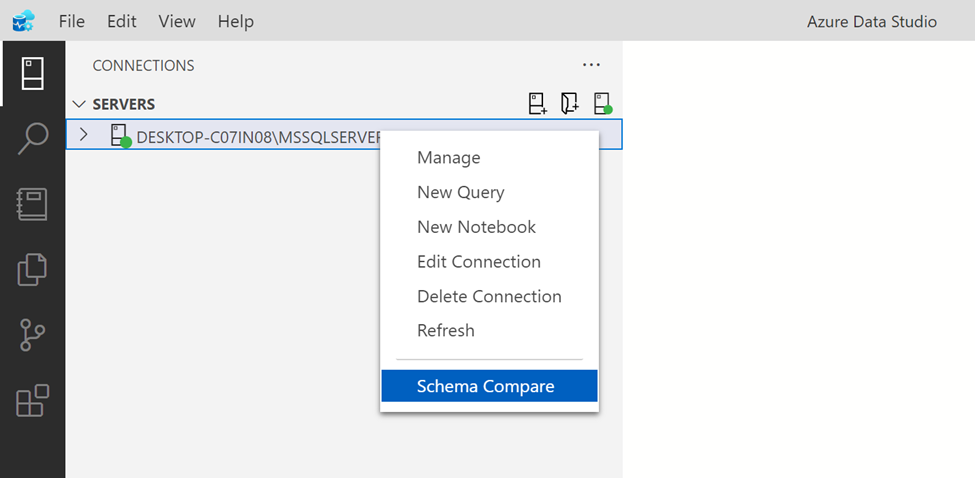
Since we installed and configured the extension, let’s compare the schema of two databases in the SQL Server connected in the earlier steps.
Step 1:
First step is to start comparing schema of two databases by right clicking on server name and selecting schema compare as shown below:
Step 2:
Scheme Compare menu will open Schema Compare window where you can select source and target SQL Server and databases connection by clicking (…) button as shown below.
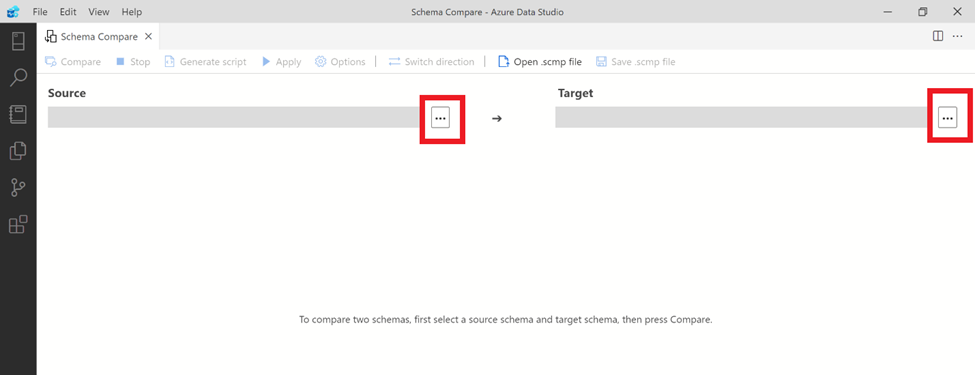
Step 3:
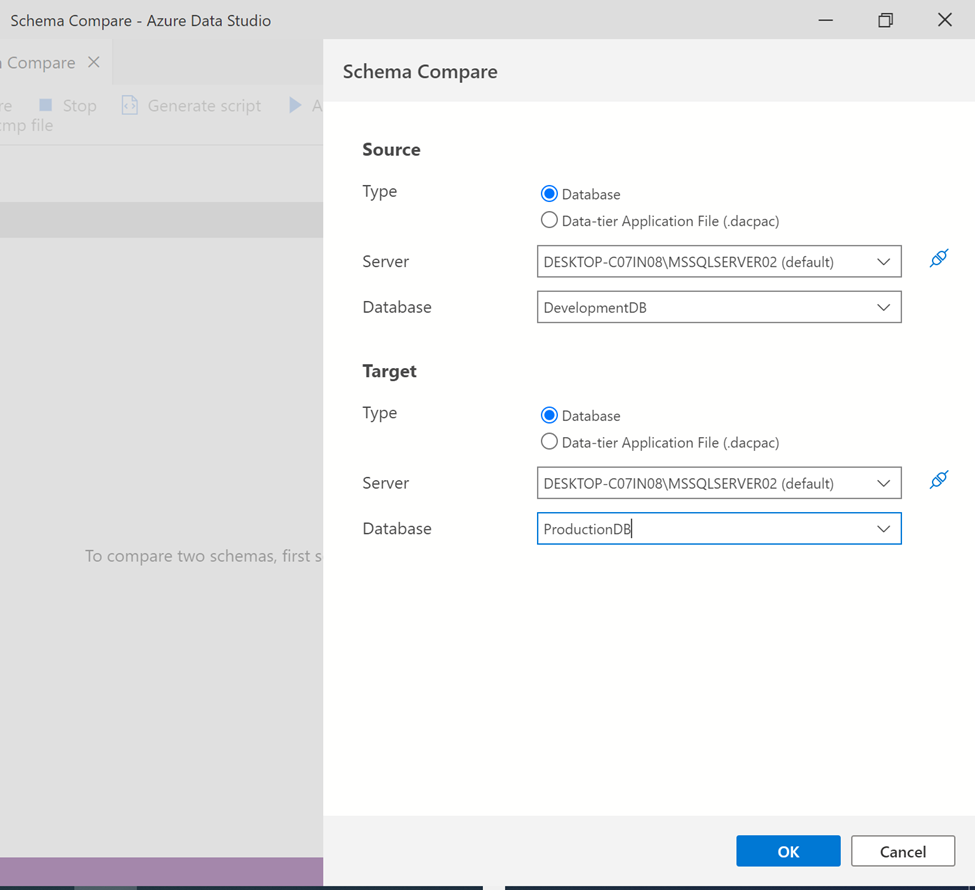
Once you click on one of the three dots (…) button, it will open both source and target SQL server and database connection window as shown below. Here, you need to carefully select the SQL Server and database in order to compare it and press OK button.
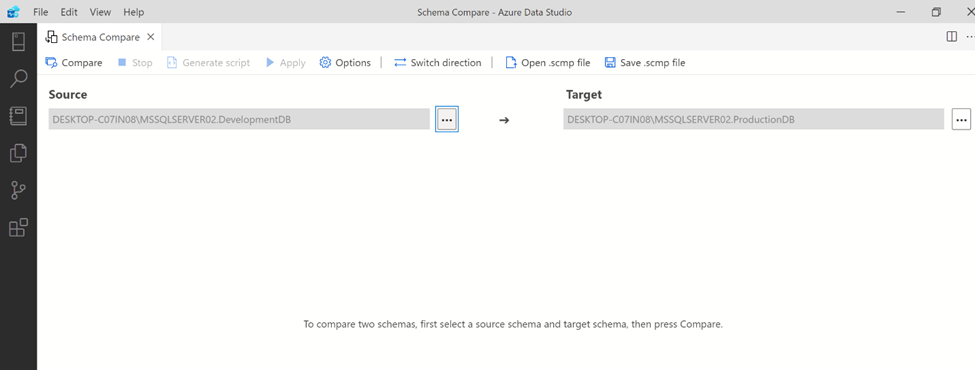
Step 4:
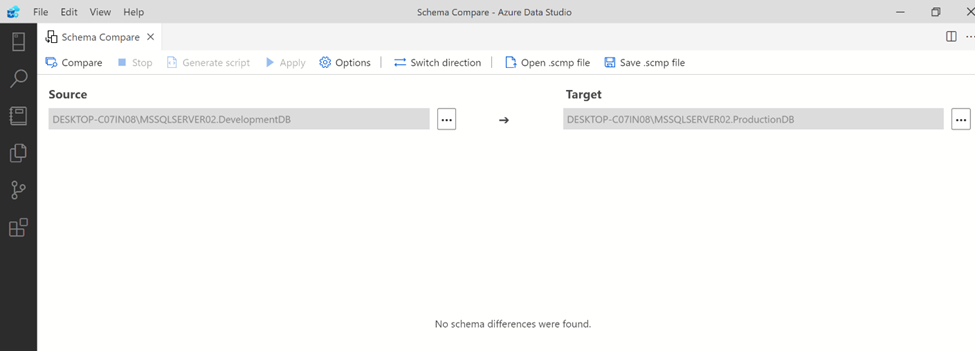
Once you press OK button, you will return to Schema Compare window and you are ready to compare schema of source database to target database.
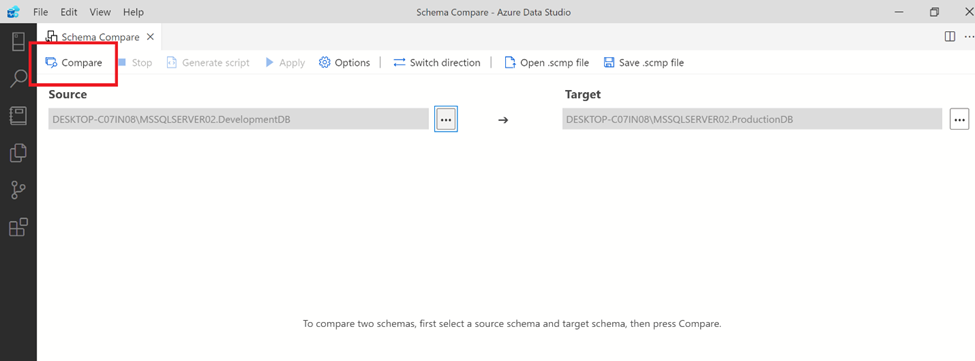
Step 5:
Now, you need to just press the Compare button to compare the schema of source and target database as shown below,
Step 6:
Now you can see, it is being compared and no difference found as shown below.
Let’s test this extension.
Step 1:
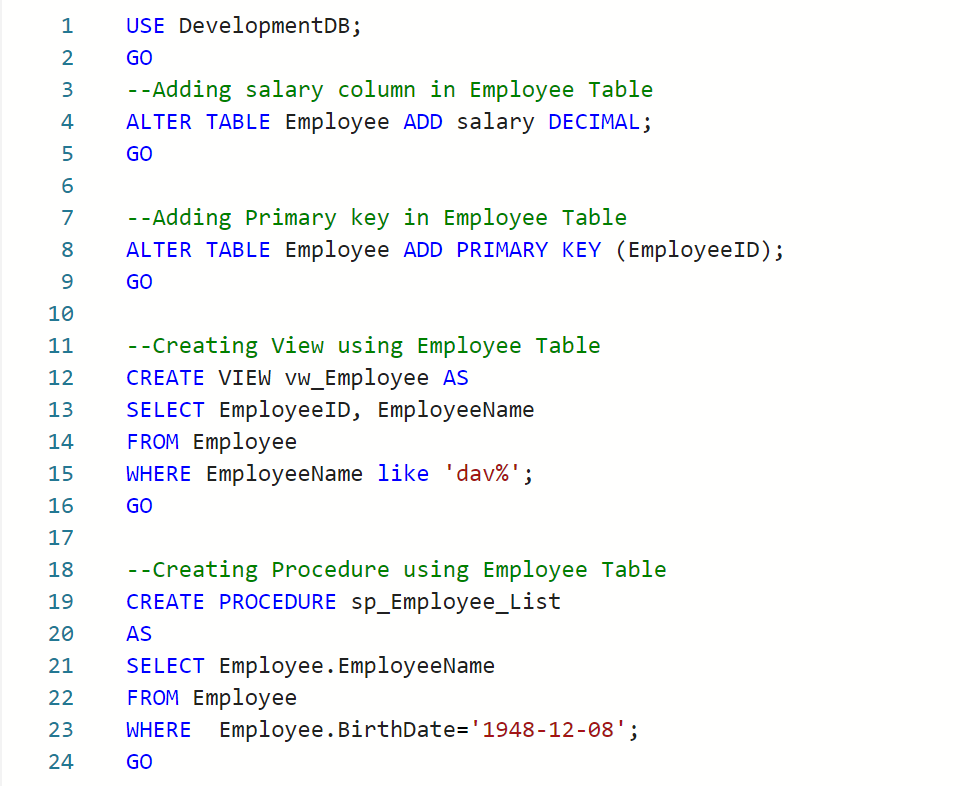
Now, let’s do some changes in development database and then compare it again. Given below are the scripts.
USE DevelopmentDB;
GO
--Adding salary column in Employee Table
ALTER TABLE Employee ADD salary DECIMAL;
GO

--Adding Primary key in Employee Table
ALTER TABLE Employee ADD PRIMARY KEY (EmployeeID);
GO

--Creating View using Employee Table
CREATE VIEW vw_Employee AS
SELECT EmployeeID, EmployeeName
FROM Employee
WHERE EmployeeName like 'dav%';
GO

--Creating Procedure using Employee Table
CREATE PROCEDURE sp_Employee_List
AS
SELECT Employee.EmployeeName
FROM Employee
WHERE  Employee.BirthDate='1948-12-08';
GO
--OUTPUT
Step 2:
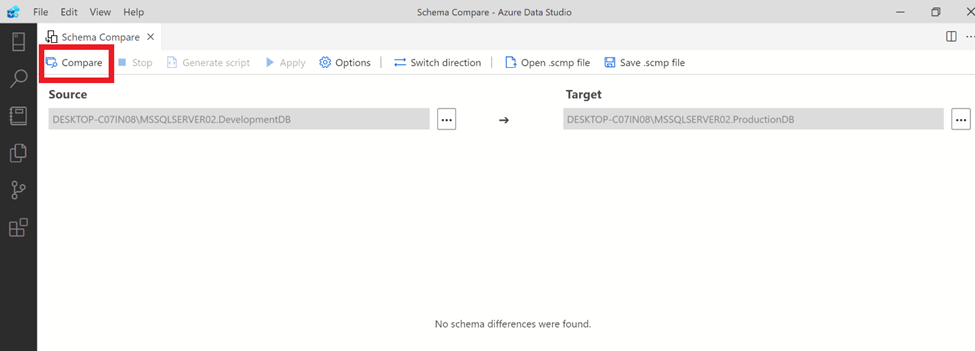
Now, changes are already done in development database. Let’s click on Compare button again to see the changes.
Step 3:
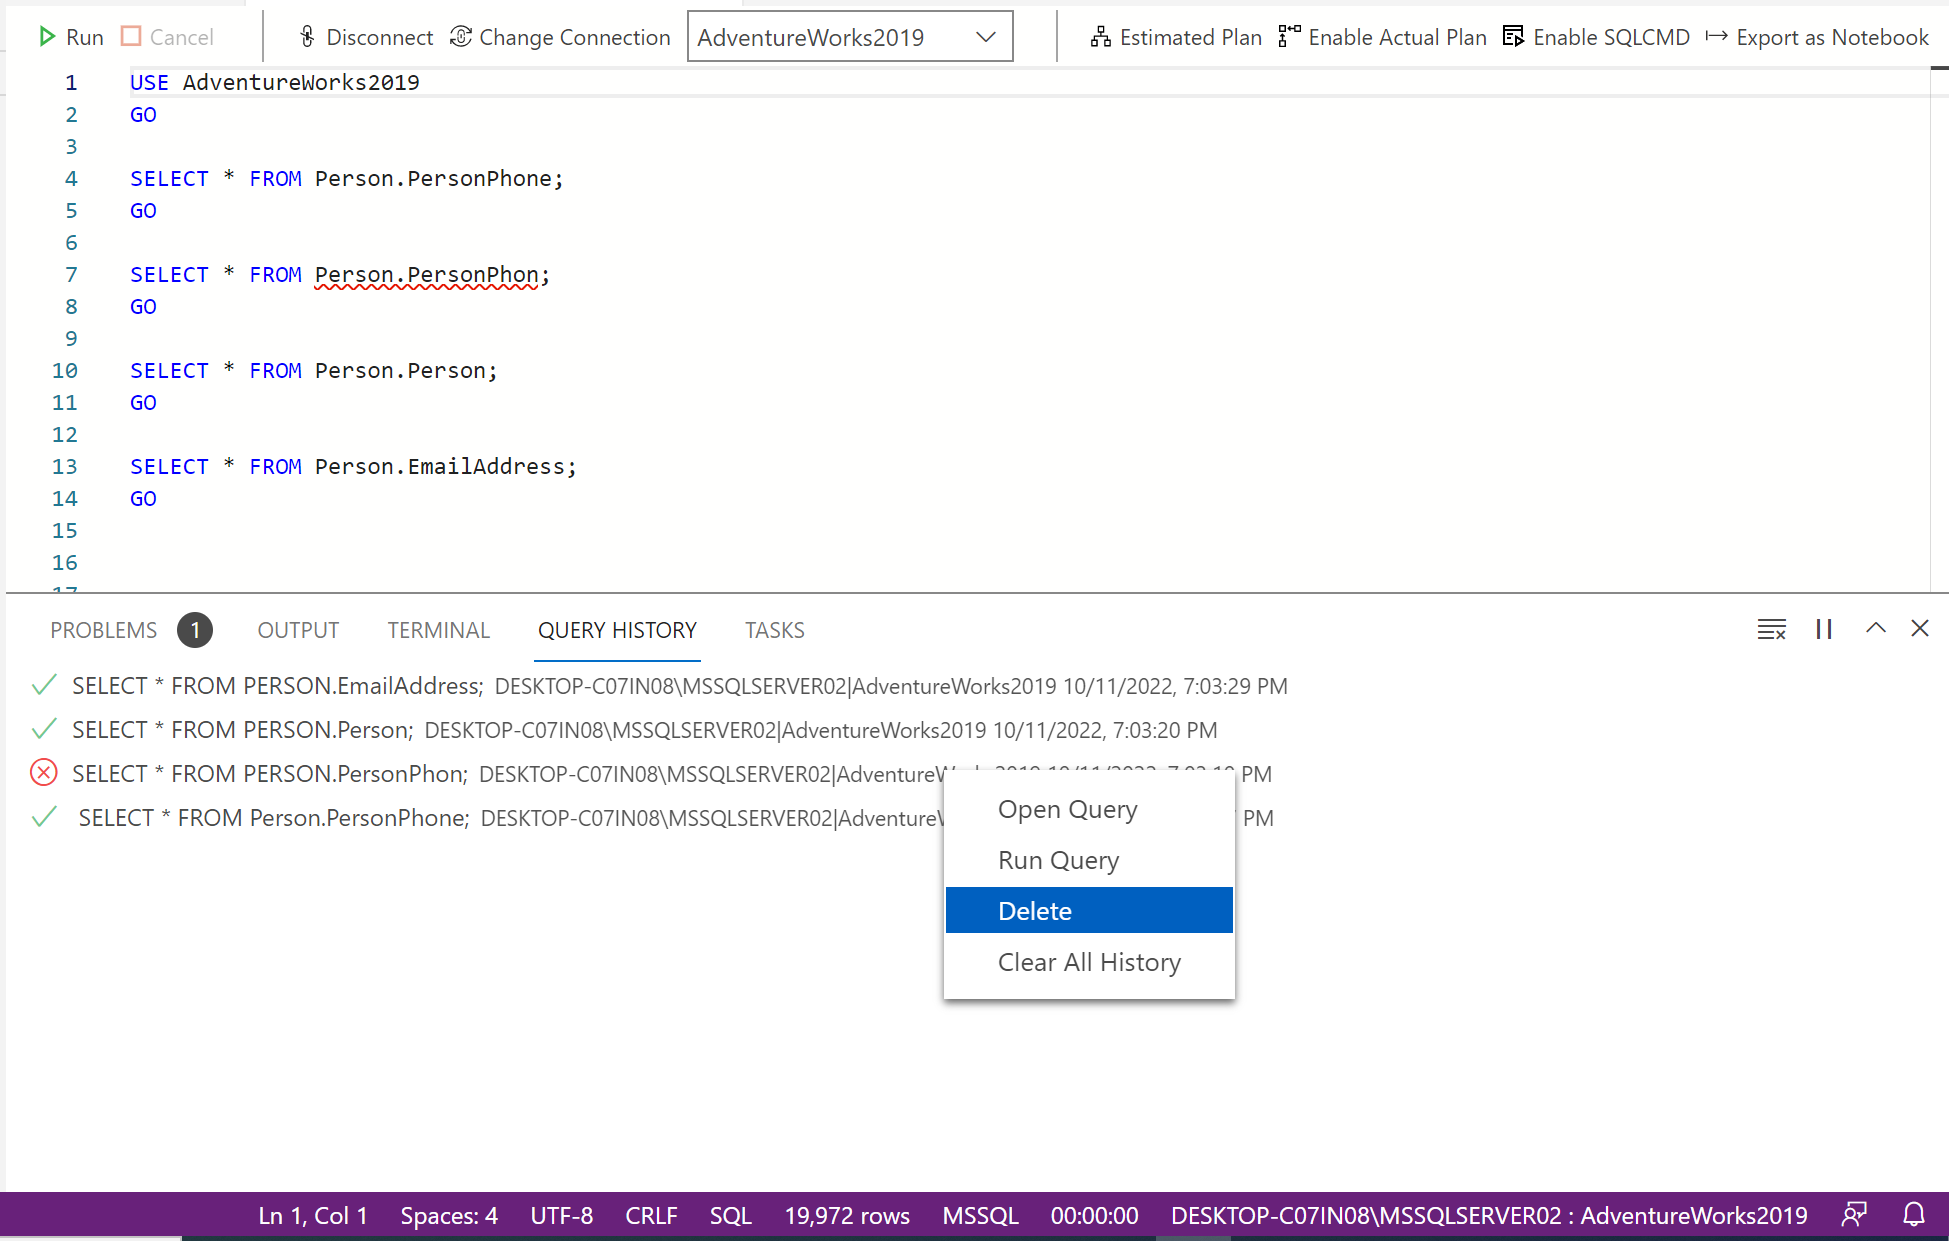
After comparing, we can see below that it detected the above changes in development database in comparison with Production Database. There is an Action column which indicates about the type of changes. There are other columns as well which gives you more details about the changes in schema and it is self explanatory.
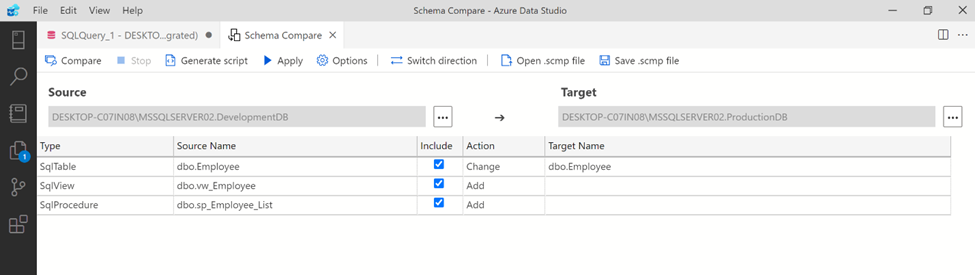
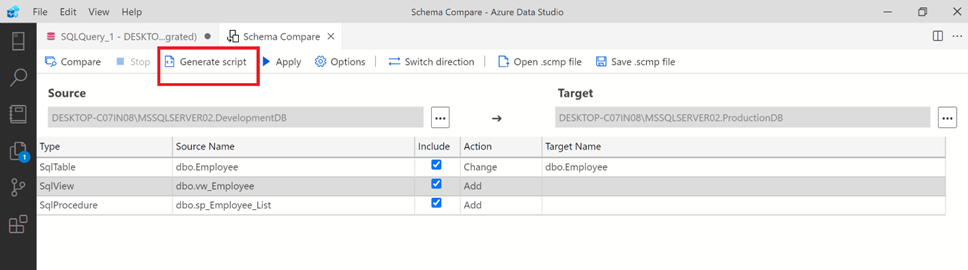
As we can see above, the difference in schema in source and target database is captured by schema compare extension and it gives us TWO options to deploy these scripts in Target database (Production).
Option 1: Generate Script
Step 1:
This option generates the change script as shown below. By default, it generates all scripts checked in the include column but you can also uncheck some of the scripts which you do not want to generate the script. It gives us freedom to deploy the script(s) at a later stage. This option can be very handy where we have a separate deployment team.
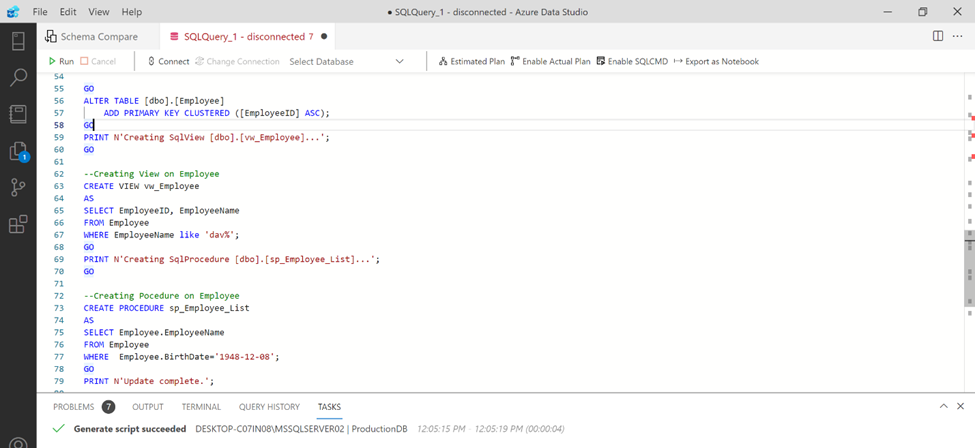
Step 2:
Once you click on the Generate Script button, it opens up like this and shows the script. You can save the script for later deployment or you can execute it immediately in the target server & database. It also gives us message that scripts generated successfully, as shown below.
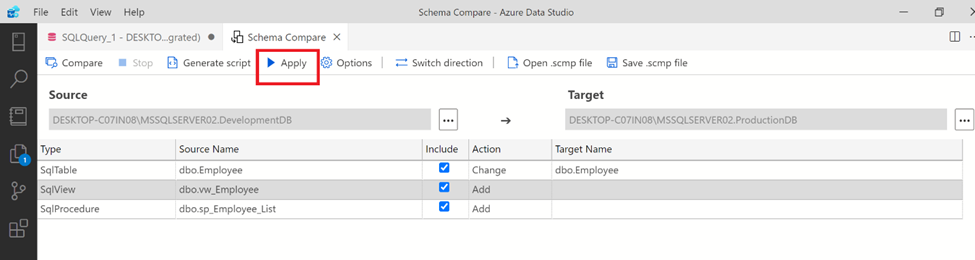
Option 2: Apply
Step 1:
This extension provides another option to deploy the scripts immediately by simply clicking on APPLY button. In this step, you need to first select the script(s) to be deployed on the target server & database from include column. After that just click on APPLY button.
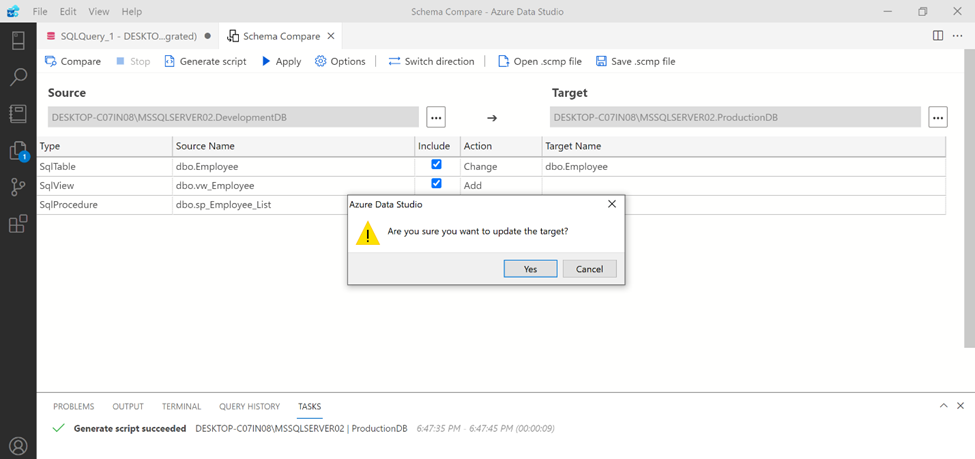
Step 2:
After that, it asks for the confirmation for the deployment. Please confirm by clicking on Yes button.
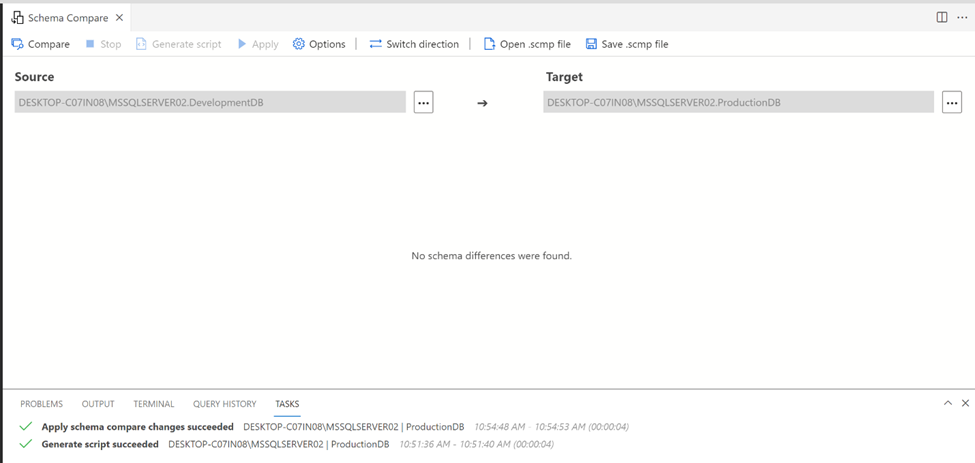
Step 3:
Upon confirmation, the target database gets updated with the changes in the source database as shown below:
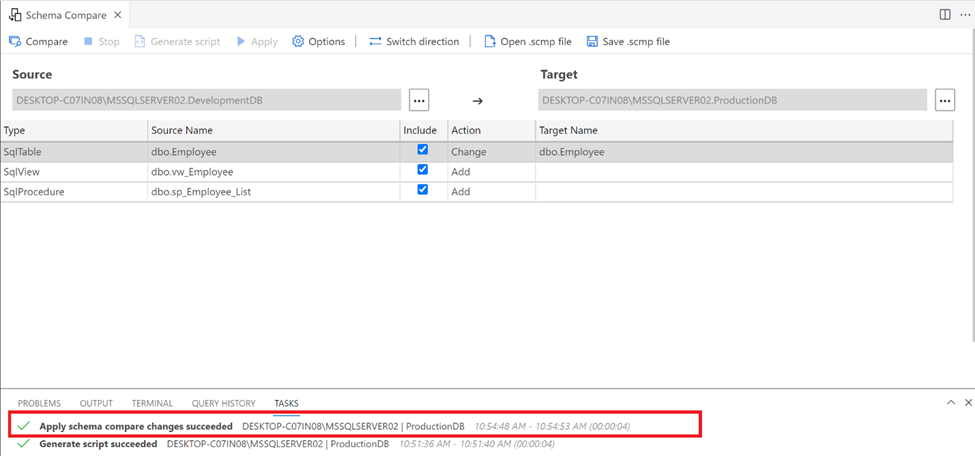
Step 4:
Now, you can compare again by pressing Compare button to check the differences and if successfully deployed then you will get given below message (No schema differences were found.)
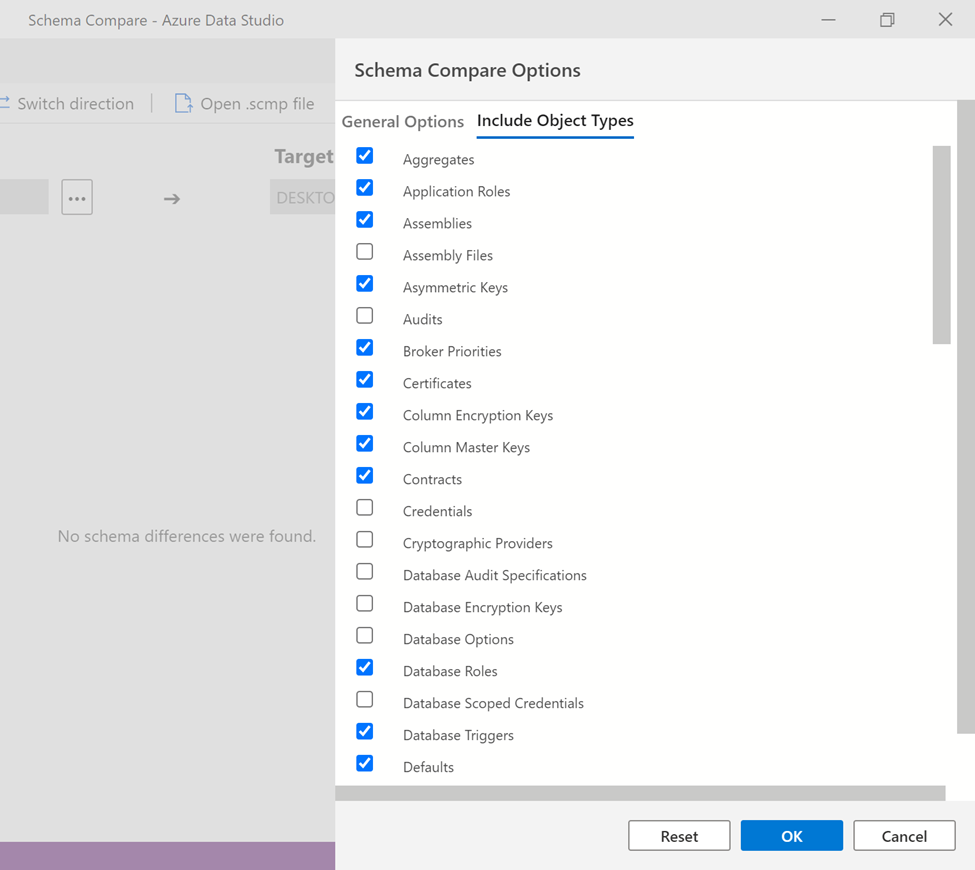
Options:
Given below Options button gives us the flexibility to select what options should be compared in the source and target databases schema.
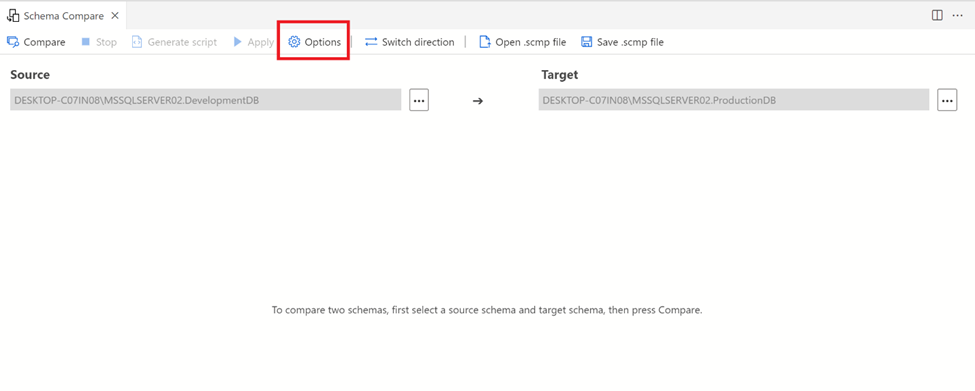
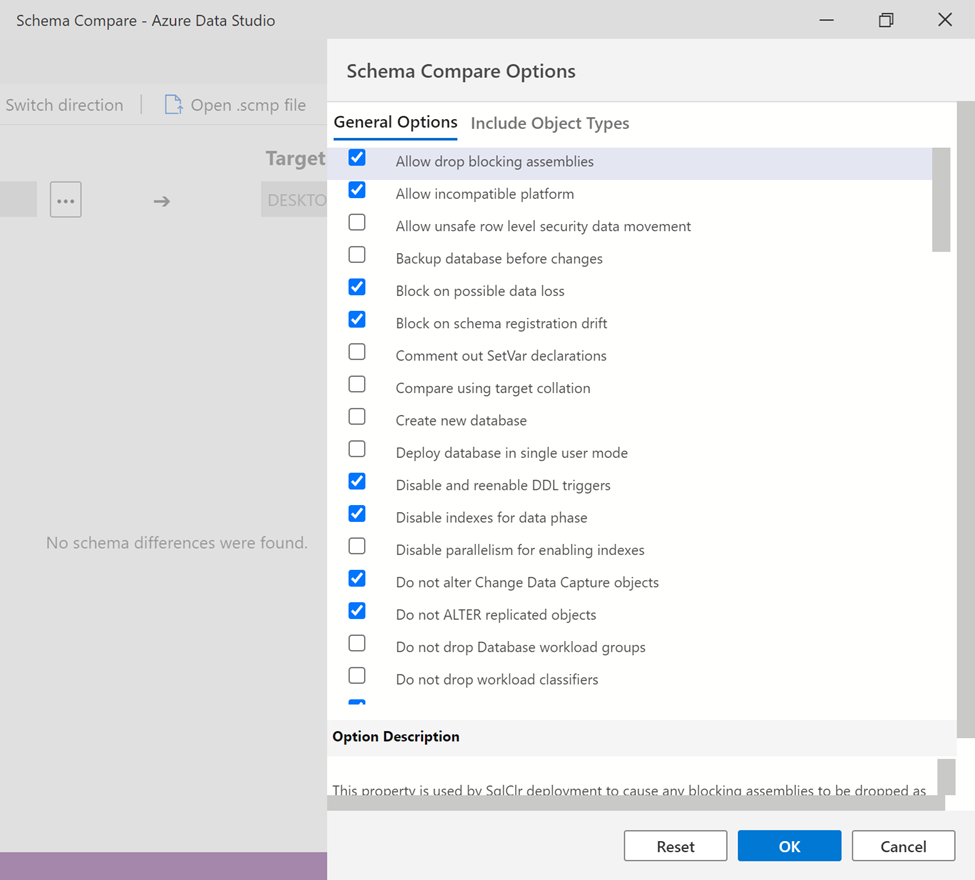
Step 1:
Once you click on Options button, it opens up Schema Compare Options window which has two tabs General Options / Include Object Types, by default most of the options are selected but many other options can be checked and unchecked from here in order to customize this compare.
Step 2:
Once you are done with the selection, just press OK button or you can Reset it to default settings by pressing Reset button.
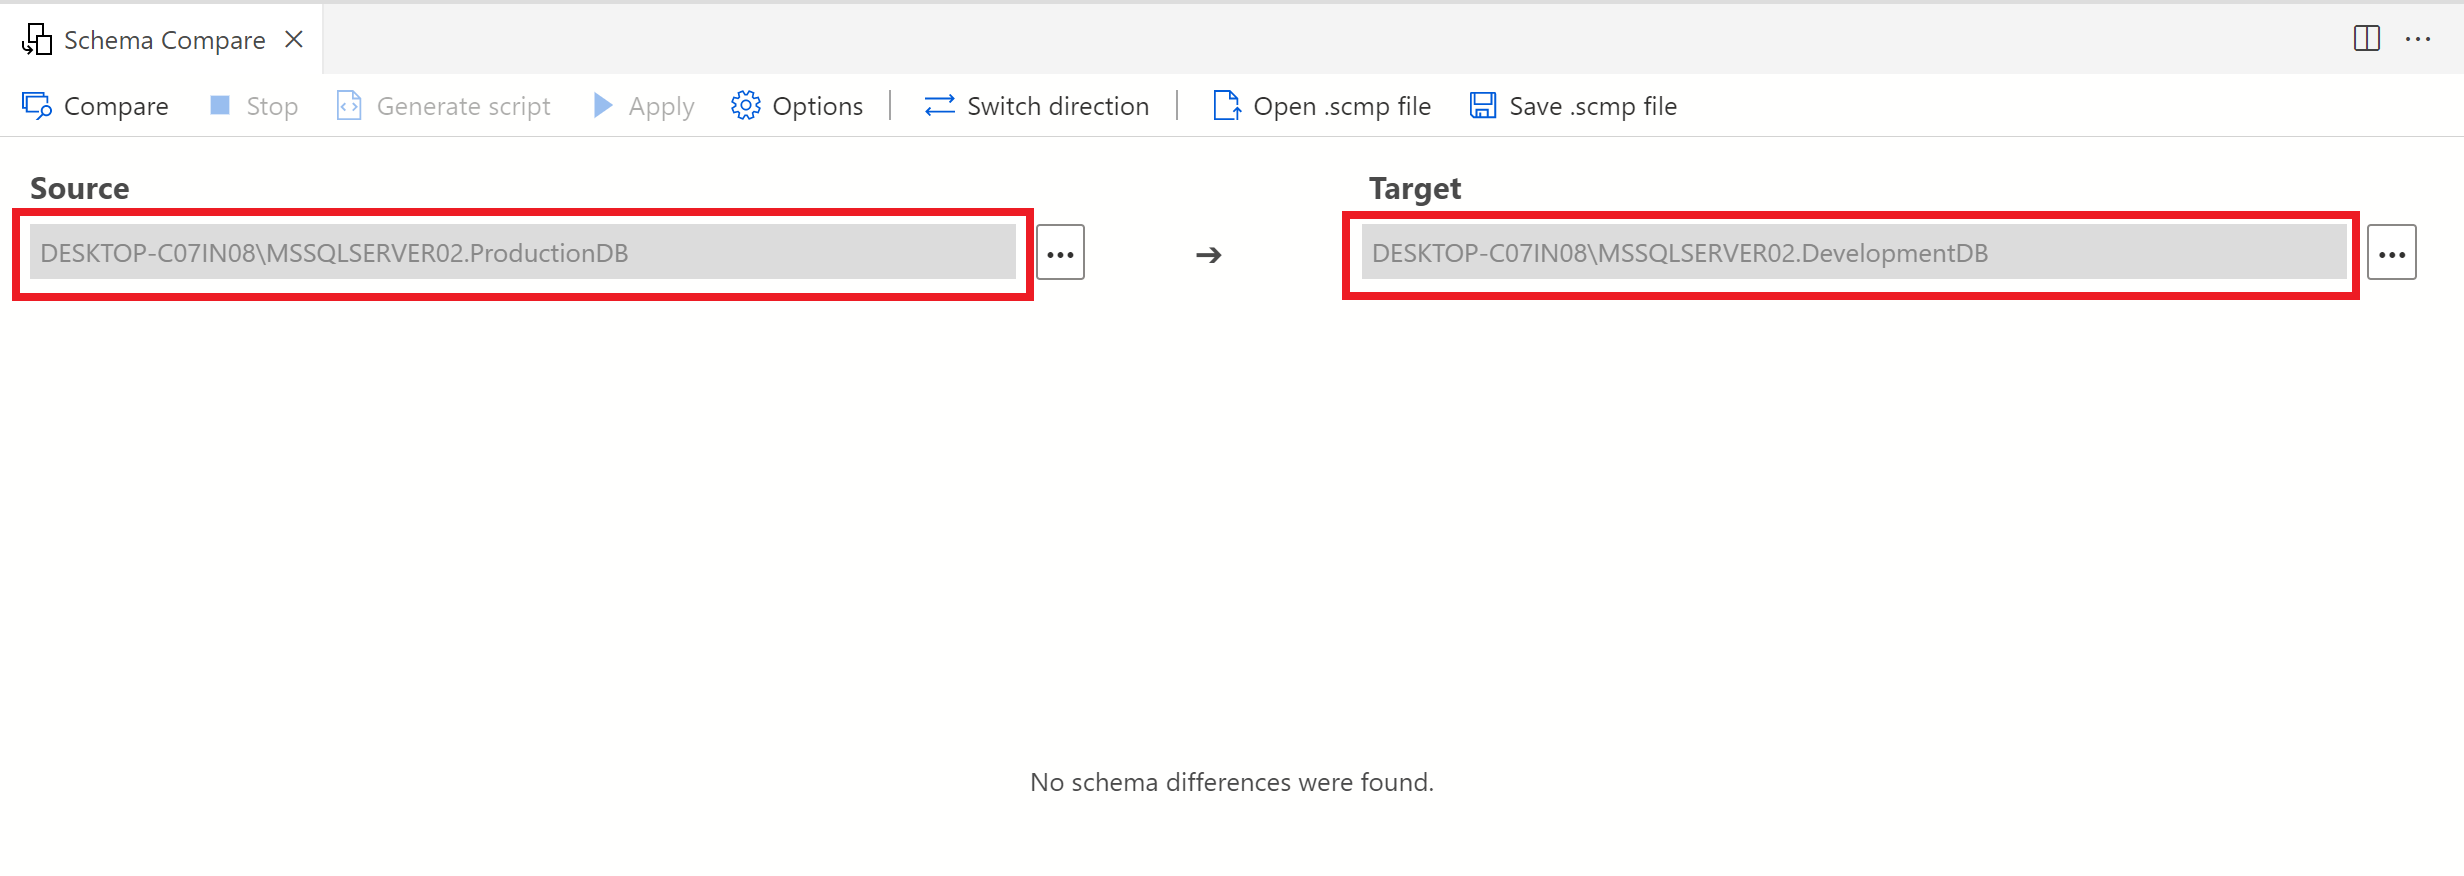
Switch direction:
As the names implies in switch direction, this option is very handy because sometimes we select source as target and vice versa. You can just fix it by simply clicking on this button as shown below.
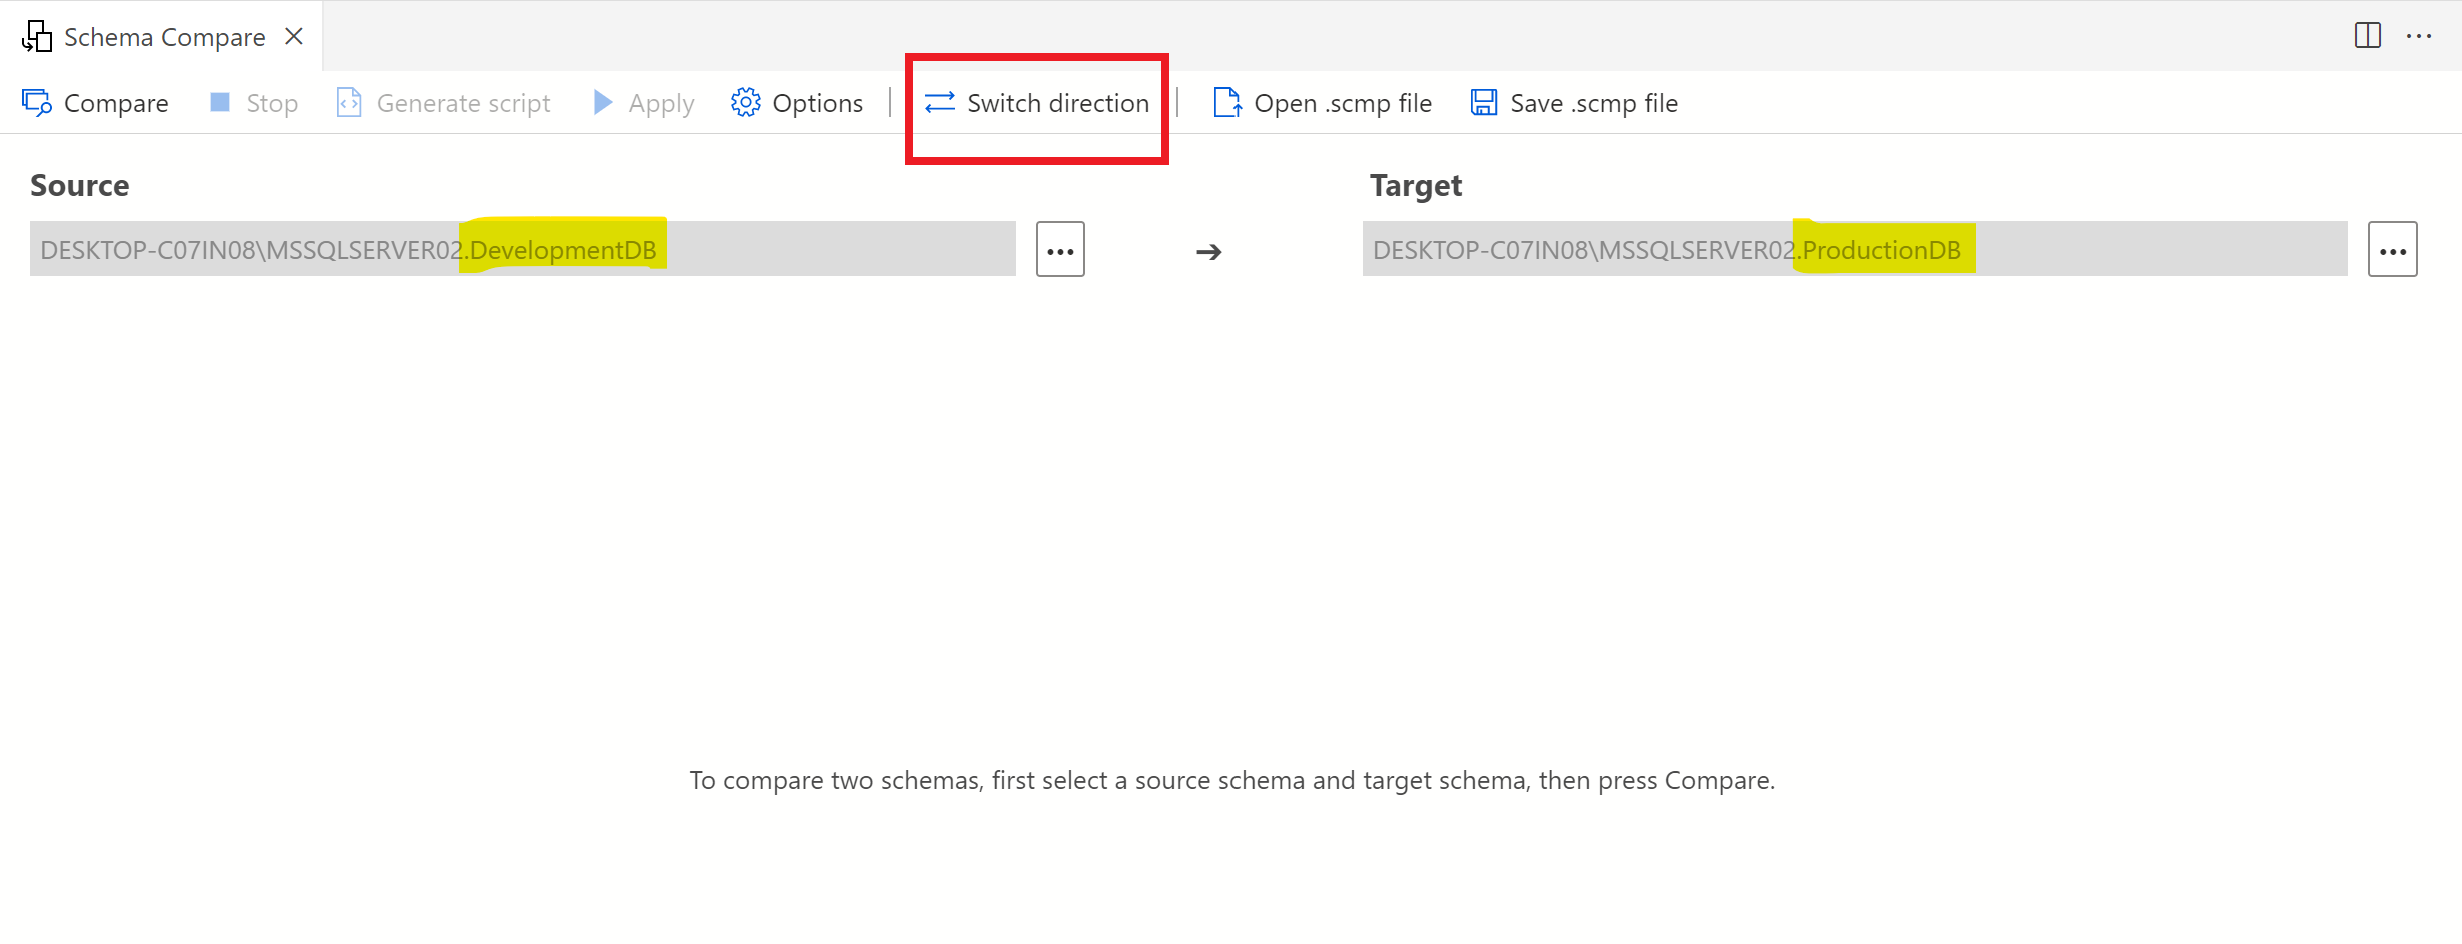
Direction has been changed as shown below:
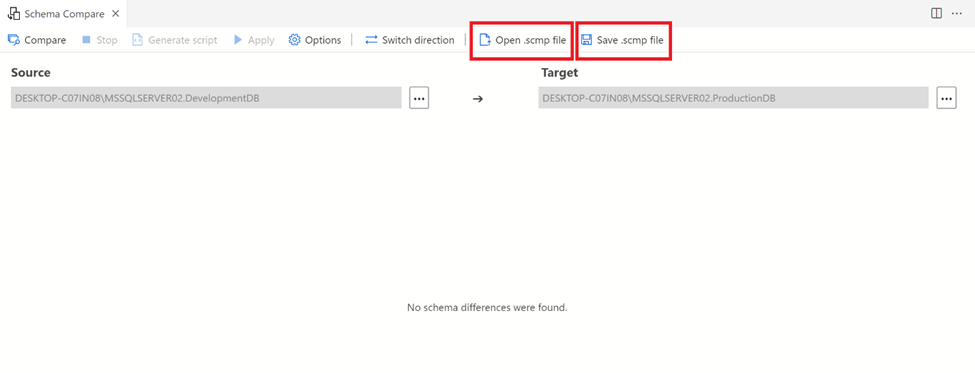
Open .scmp file & Save .scmp file:
This option gives us the flexibility to save the configuration, what we did so far in the above steps and opens it up at later stage. With the help of this option, you can create all the configuration settings one time and save it and then reuse it again and again.
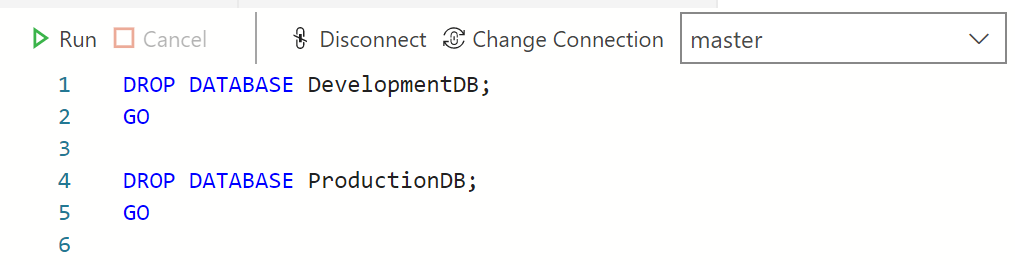
Clean Database:
In order to clean up the databases, we can use given below dode.
DROP DATABASE DevelopmentDB;
GO

DROP DATABASE ProductionDB;
GO
--OUTPUT
Conclusion:
This is a very handy extension, when it comes to script deployment. Do let me know, how do you deploy your scripts.