In SQL Server 2022, a new column namely last_valid_restore_time has been added to the table backupset as a part of the enhancements. It contains the information regarding the last valid restore time, and it became very handy when something happens to your database and you need to restore data from the backup and you want to know the exact last valid restore time. Actually, it is the time when you post your last transaction in your database before taking backup. By the way, last transaction can be way before you take your backup.
One important point is that it shows the last_valid_restore_time in Transaction Log Backup ONLY. In Full Backup & differential back, it returns NULL value and which makes sense.
Let me create a sample database, a table and insert a record to demonstrate the behaviour of last_valid_restore_time as shown below.
Sample:
USE master
GO

CREATE DATABASE TESTDB;
GO

USE TESTDB
GO

CREATE TABLE Customers
(
 CustomerID   INT IDENTITY,
 CustomerName VARCHAR(100),
 CreatedAt    DATETIME,
 ModifiedAt   DATETIME
);
GO

INSERT INTO Customers(CustomerName, CreatedAt)
VALUES('Customer-1', GETDATE());
GO

SELECT * FROM Customers;
GO
--OUTPUT

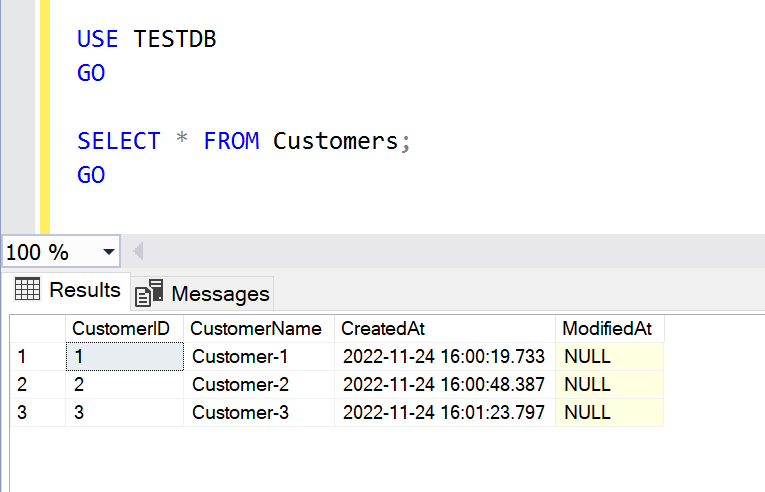
Step 1: Full Backup
In this step, we will take full backup of the database.
--Taking full backup
BACKUP DATABASE TESTDB
TO DISK ='D:\Backup\TESTDBfullbackup.BAK';
GO
--OUTPUT

Step 2: Differential Backup
In this step, first we will insert a new record then will take differential backup.
USE TESTDB
GO

INSERT INTO Customers(CustomerName, CreatedAt)
VALUES('Customer-2', GETDATE());
GO

--Taking differential backup
BACKUP DATABASE TESTDB
TO DISK ='D:\Backup\TESTDBdifferentialbackup.BAK'
WITH DIFFERENTIAL;
GO

SELECT * FROM Customers;
GO
--OUTPUT

Step 3: Log backup
In this step, we will insert and update few records and then take log backup.
USE TESTDB
GO

INSERT INTO Customers(CustomerName, CreatedAt)
VALUES('Customer-3', GETDATE());
GO

UPDATE Customers
SET    CustomerName = 'Customer22'
     , ModifiedAt   =  GETDATE()
FROM   Customers
WHERE  CustomerID = 2;
GO

--Taking log backup
BACKUP LOG TESTDB
TO DISK ='D:\Backup\TESTDBlogbackup1.TRN' ;
GO

SELECT * FROM Customers;
GO
--OUTPUT
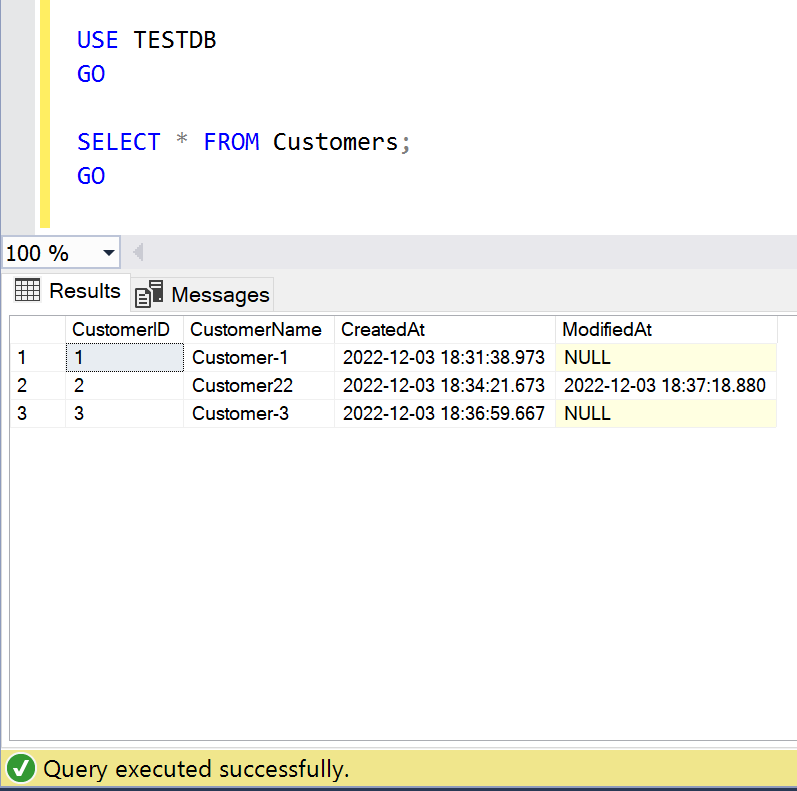
Step 4: Last Valid Restore Time
Now, we have successfully created the sample along with backups. Let me run the query and add this new column namely last_valid_restore_time as shown below. As we can see, the last_valid_restore_time & the last record modified date & time is same which is 2022-12-03 18:37:18.
SELECT bs.database_name, backuptype = CASE
        WHEN bs.type = 'D' AND bs.is_copy_only = 0 THEN 'Full Database'
        WHEN bs.type = 'D' AND bs.is_copy_only = 1 THEN 'Full Copy-Only Database'
        WHEN bs.type = 'I' THEN 'Differential database backup'
        WHEN bs.type = 'L' THEN 'Transaction Log'
        WHEN bs.type = 'F' THEN 'File or filegroup'
        WHEN bs.type = 'G' THEN 'Differential file'
        WHEN bs.type = 'P' THEN 'Partial'
        WHEN bs.type = 'Q' THEN 'Differential partial'
        when bs.type = 'i' THEN 'last valid restore value' END + ' Backup',
    CASE bf.device_type
        WHEN 2 THEN 'Disk' WHEN 5 THEN 'Tape' WHEN 7 THEN 'Virtual device'
        WHEN 9 THEN 'Azure Storage' WHEN 105 THEN 'A permanent backup device'
        ELSE 'Other Device' END AS DeviceType,
    bms.software_name AS backup_software,
    /**New column addition in SQL Server 2022**/
    bs.last_valid_restore_time,
    /**************************************/
    BackupStartDate = bs.Backup_Start_Date,
    BackupFinishDate = bs.Backup_Finish_Date,
    LatestBackupLocation = bf.physical_device_name,
    backup_size_mb = CONVERT(DECIMAL(10, 2), bs.backup_size / 1024. / 1024.),
    compressed_backup_size_mb = CONVERT(DECIMAL(10, 2), bs.compressed_backup_size / 1024. / 1024.),
    database_backup_lsn, -- For tlog and differential backups, this is the checkpoint_lsn of the FULL backup it is based on.
    checkpoint_lsn,
    begins_log_chain,
    bms.is_password_protected
FROM msdb.dbo.backupset bs
LEFT JOIN msdb.dbo.backupmediafamily bf
    ON bs.[media_set_id] = bf.[media_set_id]
INNER JOIN msdb.dbo.backupmediaset bms
    ON bs.[media_set_id] = bms.[media_set_id]
WHERE bs.backup_start_date > DATEADD(MONTH, - 2, sysdatetime()) --only look at last two months
ORDER BY bs.database_name ASC,
    bs.Backup_Start_Date DESC;
--OUTPUT

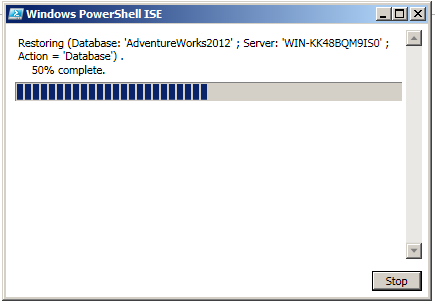
Step 5: Restore
Now, in order to get data before the execution of update statement, we are going to check the last_valid_restore_time and restore the database before the last_valid_restore_time which will return the data before update of the table as shown below.
USE [master]
RESTORE DATABASE [TESTDB]
FROM  DISK = N'D:\Backup\TESTDBfullbackup.BAK'
WITH  FILE = 1,  NORECOVERY,  NOUNLOAD,  REPLACE,  STATS = 5
RESTORE DATABASE [TESTDB]
FROM  DISK = N'D:\Backup\TESTDBdifferentialbackup.BAK'
WITH  FILE = 1,  NORECOVERY,  NOUNLOAD,  STATS = 5
RESTORE LOG [TESTDB]
FROM  DISK = N'D:\Backup\TESTDBlogbackup1.TRN'
WITH  FILE = 1,  NOUNLOAD,  STATS = 5,  STOPAT = N'2022-12-03T18:37:15'
GO

--OUTPUT
Conclusion:
Last_valid_restore_time is very handy information when we want to know the last transaction date in the specified backup & would like to restore based on specific time. Do let me know, how were you tracking this time in earlier version of SQL Server 2022.