In my earlier articles, I wrote about how to insert buit-in code snippet in SQL Server script. But sometimes due to the requirements, we need to create our own custom snippet. Once you create the custom snippet(s) , you need to register these snippets, because without registration you cannot use in the SQL Server Query editor.
There are two ways two register the code snippet. Given below are the details.
Method 1 :
In this method, you can add folder having code snippet file(s). The advantage of this method is that you do not need to do one by one code snippet files.
Let me explain it step by step.
Step 1 :
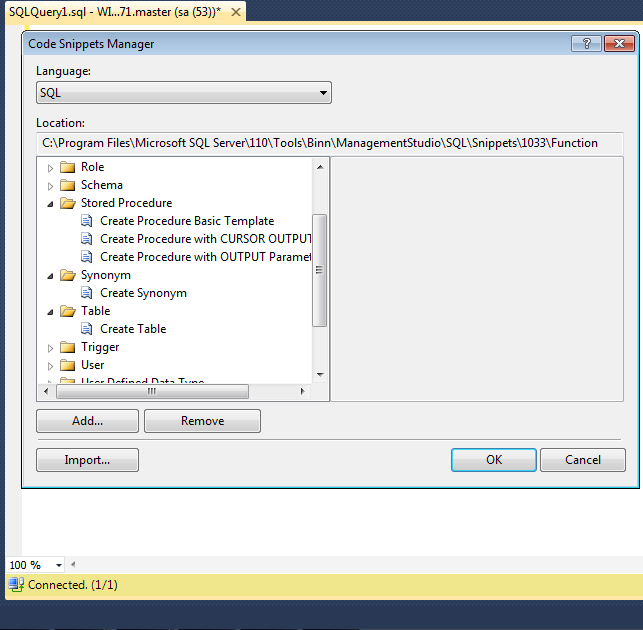
In this step, browse the Tools menu and select the Code Snippet Manager as shown in the picture below.

It will open the code snippet manager as shown in the picture below.
Step 2 :
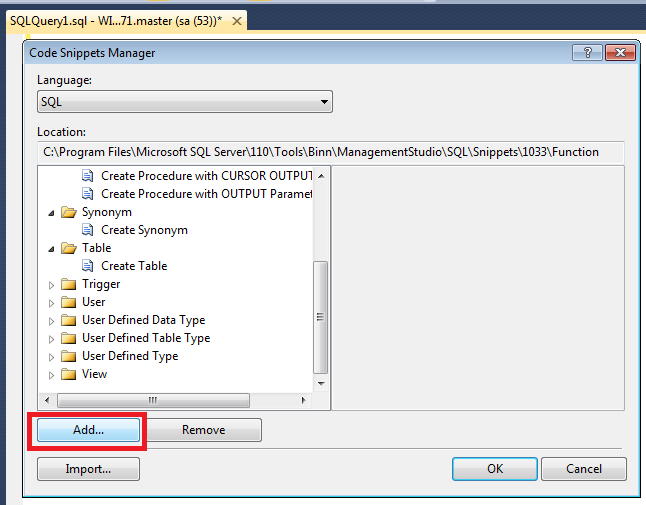
As you can see above, multiple built-in folders and snippet files for standard objects code snippets are available in the Code Snippet Manager. Now, you need to add custom folder and snippet files in the Code snippet Manager. Click on the Add.. button as shown in the picture below.
Step 3 :
Once you click on the Add.. button, it will open the files explorer, now you need to select the folders having snippet files.You cannot select an individual file using Add.. button. Just to explain this registration, I created one folder namely Custom and placed few code snippet file in it. Once you select the folder click on Select Folder button as shown in the picture below.

Step 4 :
Now, you can see that custom folder and snippet files are registered and added in the Code Snippet Manager as shown in the picture below.

Method 2 :
In this method you can add multiple files into any custom folders.
Let me explain this method step by step.
Step 1 :
This step will be same as method 1.
Step 2 :
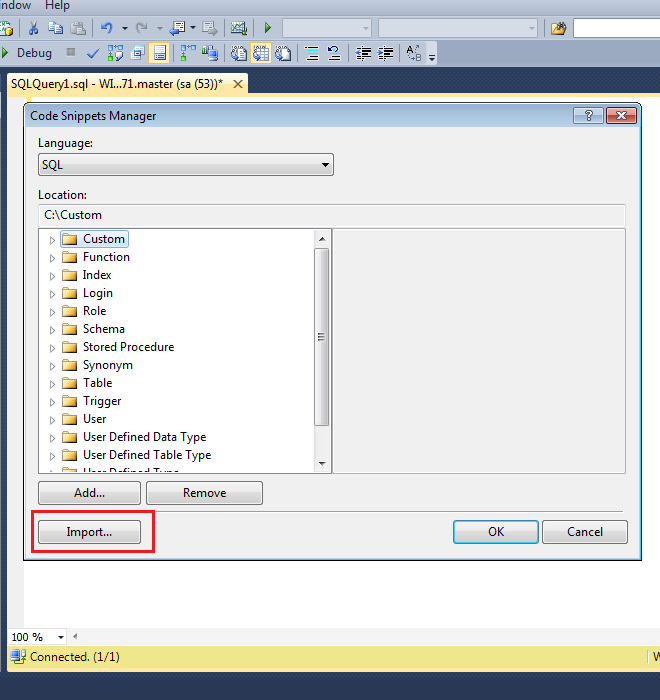
Once you are in the Code Snippet Manager, click on Import button as shown in the picture below.
Step 3 :
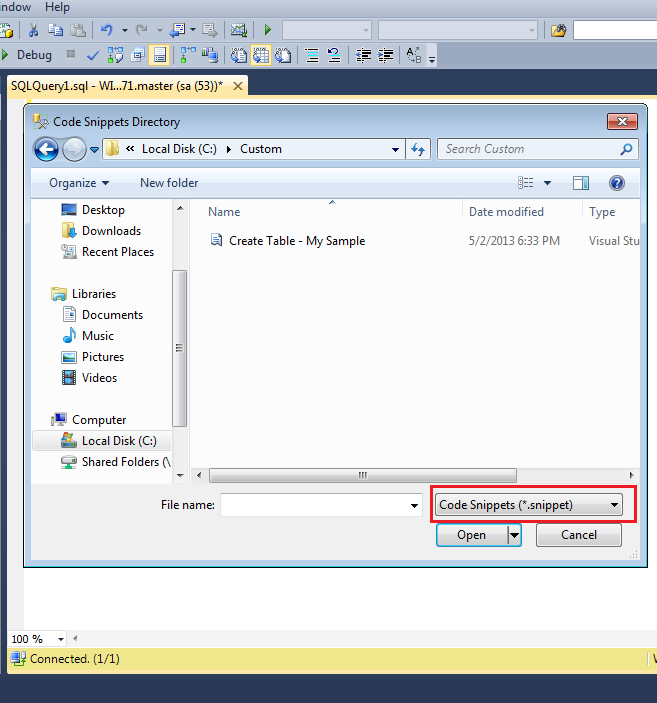
Once you click on Import button, it will open an explorer and allow you to select code snippet file(s).
Once you selected the file(s), click on Open button as shown in the picture below.
Step 3 :
Once you select the code snippet file(s), it will open an another import window and ask in which custom folder you want to add this file(s) as shown in the picture below.

Step 4 :
Once you select any custom folder for the code snippet file(s), click Finish button. The snippet file(s) will be available in that custom folder as shown in the image below.

Reference : MSDN

[…] below. Just copy the given below script and save as “Create Sequence.snippet” and register it. Once registered, you can use it like any other custom […]