Feeds:
Posts
Comments

Posts Tagged ‘Download Publishing Profile’

In my earlier article, I explained, how to RESTORE the backup from URL using T-SQL and it was quite simple & easy to understand. In this article, I will explain how to how to RESTORE the backup from URL using SQL Server Management Studio (SSMS). It would be the same configuration but with the different screens & steps.

Pre-Requisite :

  1. Microsoft Azure – How to create storage and container
  2. SQL SERVER 2014 – How to take backup to URL (Windows Azure Storage) – SSMS

Let me now demonstrate in few easy steps how to RESTORE backup from URL.

Step 1 – Create Account, storage & container :
First of all you need to create a windows Azure account, a storage and a container as explained in this article.

Step 2 – Create Credential :
Once you have the details of Azure account, you need to create the credential using given below script. But if you notice, this script requires two parameters namely IDENTITY & SECRET. So how will I get them? Actually IDENTITY is the storage name that we created in the Pre-Requisite article -1 (Step 4) namely ‘raresql‘ and SECRET is the primary access key that we also picked up in the Pre-Requisite article -1 (Step 5). Lets create a credential.

Note: Please skip this step if you have already created the credentials.

USE master
GO
CREATE CREDENTIAL [My_Credential]
WITH IDENTITY ='raresql'
,SECRET = '/ByNUTZqJ6EcJR/VQcNmNj+zSu++iCfbcxlyWye6Ok9uY3L5nw3XkndmAnDjiKn'
GO

Step 3 – Open Windows Azure Storage dialogue box :
Once you created the credentials, the next step is to right click on the particular database you want to restore the back up and select tasks, further you need to select Restore and Database … as shown below.

How to take backup to URL (Windows Azure Storage) - SSMS.1.1

Step 4 – Connect to Windows Azure Storage :
Now, SSMS opened the Connect Windows Azure Storage dialogue box, here you need to enter storage account (Pre-Requisite article -1 (Step 4)), account key (Pre-Requisite article -1 (Step 5)) & select / create the credentials. As we have already created the credentials in the above step, we will just select the credentials and click on Connect button as shown below.

How to take backup to URL (Windows Azure Storage) - SSMS.1.2

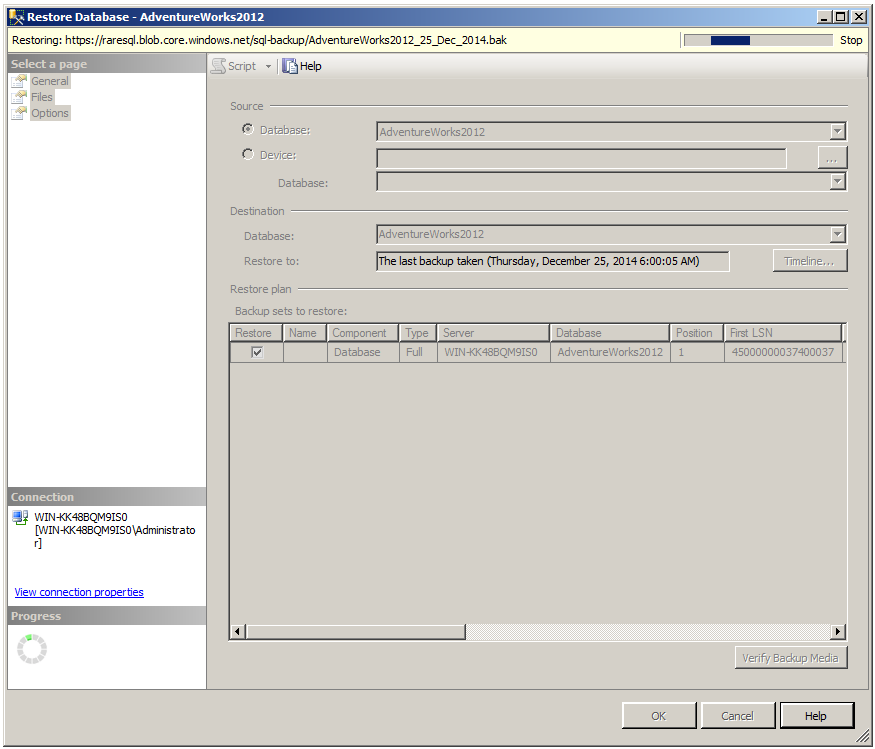
Step 5 – RESTORE the backup from URL :
Once you click on the Connect button, it will authenticate your account with Azure, once it will be authenticated, it will open the restore dialogue box and shows your back up. Now, you can select the back and restore it as shown below.

How to take backup to URL (Windows Azure Storage) - SSMS.1.3

How to take backup to URL (Windows Azure Storage) - SSMS.1.4

How to take backup to URL (Windows Azure Storage) - SSMS.1.5

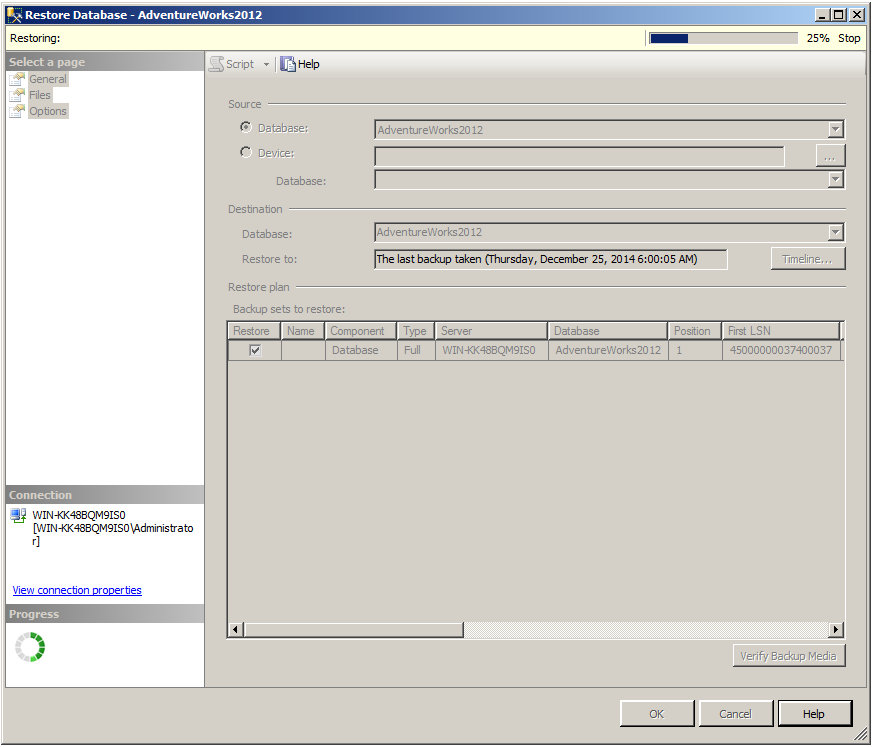
As you can see, the messages show that your backup has been restored successfully.

Read Full Post »

In my earlier article, I explained how to take SQL Server backup to URL in SQL Server 2014 using T-SQL. In this article, I will explain how to take SQL Server backup to URL using SQL Server Management Studio (SSMS).

Pre-Requisite :

Let me demonstrate in few easy steps how to take backup to URL using SSMS.

Step 1 – Create Account, storage & container :
First of all, you need to create a windows Azure account, a storage and a container as explained in this article. This step is mandatory to move forward.

Step 2 – Download Publishing Profile :
Once you have the details, you need to download the publishing profile. We will use this publishing profile in the next step to create credentials. Given below is the URL that will take you to your Microsoft Azure account, and once you log in your account, it will download the publishing profile having extension of .publishsettings.

Step 3 – Open Backup dialogue Box :
The next step is to take the backup of any database on Microsoft Azure. In order to do it, first of all select that database, right click on it, go to tasks and further select backup as shown below. This is the same procedure we follow to take the traditional backup.

SQL Server Back to Azure using SSMS.1..1

Step 4 – Open Credential Dialogue box :
Once you selected the backup option, it will open the backup dialogue box. Here, you need to select the Back up to is URL. Here you see few backup options but for now you need to ignore these options and create credentials. Click the Create credential button as shown below.

SQL Server Back to Azure using SSMS.1.3

Step 5 – Create Credential :
Now, you are in the credential creation screen, here you need to BROWSE the file which you have downloaded in Step 2. Then SELECT the CERTIFICATE, it will automatically populate the STORAGE(s) after AZURE account verification. Then you need to select the STORAGE. Once you are done with all selections, you need to give a NAME to the credential and press Create button.

Note : If you have already created the credentials, you do not need to follow this step.

SQL Server Back to Azure using SSMS.1.4

Step 6 – Setup Backup options :
Once you created the credential, you will revert to back up dialogue box and your created credential will be selected automatically. Now you need to enter the FILE NAME of the backup as well as the AZURE STORAGE CONTAINER NAME that we have created in earlier article at Step 9 as shown below. Press OK button.

SQL Server Back to Azure using SSMS.1.5

Step 7 – Back Up in Progress :
Once you pressed OK button, the back up operation will start, however as compared to local, this back up operation will be slow. Be patient and wait for it to finish the operation as shown below.

SQL Server Back to Azure using SSMS.1.6

SQL Server Back to Azure using SSMS.1.7

SQL Server Back to Azure using SSMS.1.8

Step 8 – Verify backup to URL :
The back up is done now, lets go to the container inside the storage in Windows Azure and check if the backup is available there or NOT because we saw the confirmation report in the above step.

SQL Server Back to Azure using SSMS.1.9

As you can see above, the Back up is available in Azure. Isn’t it cool 😉 ?

Read Full Post »