Feeds:
Posts
Comments

Posts Tagged ‘Storage’

I presume this will be your first step towards Azure SQL Server and I am sure you will find this article as a guideline to proceed and create SQL Server & database in Azure.
Given below is a step by step approach, demonstrating how to create them using simple steps.

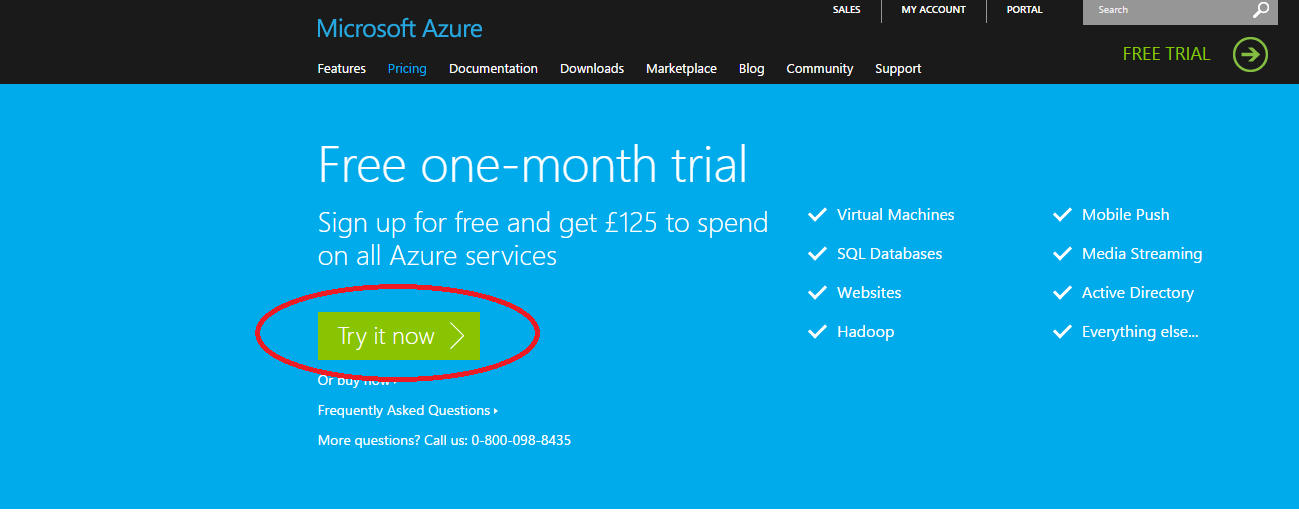
Step 1 : (Create Azure Account)
First of all, you need to create a Microsoft Azure account (it is free for one month ONLY, however it asks the credit card details for verification ONLY).

Free tial account of Azure.1.1

Note : If you already have Azure account, skip this step.

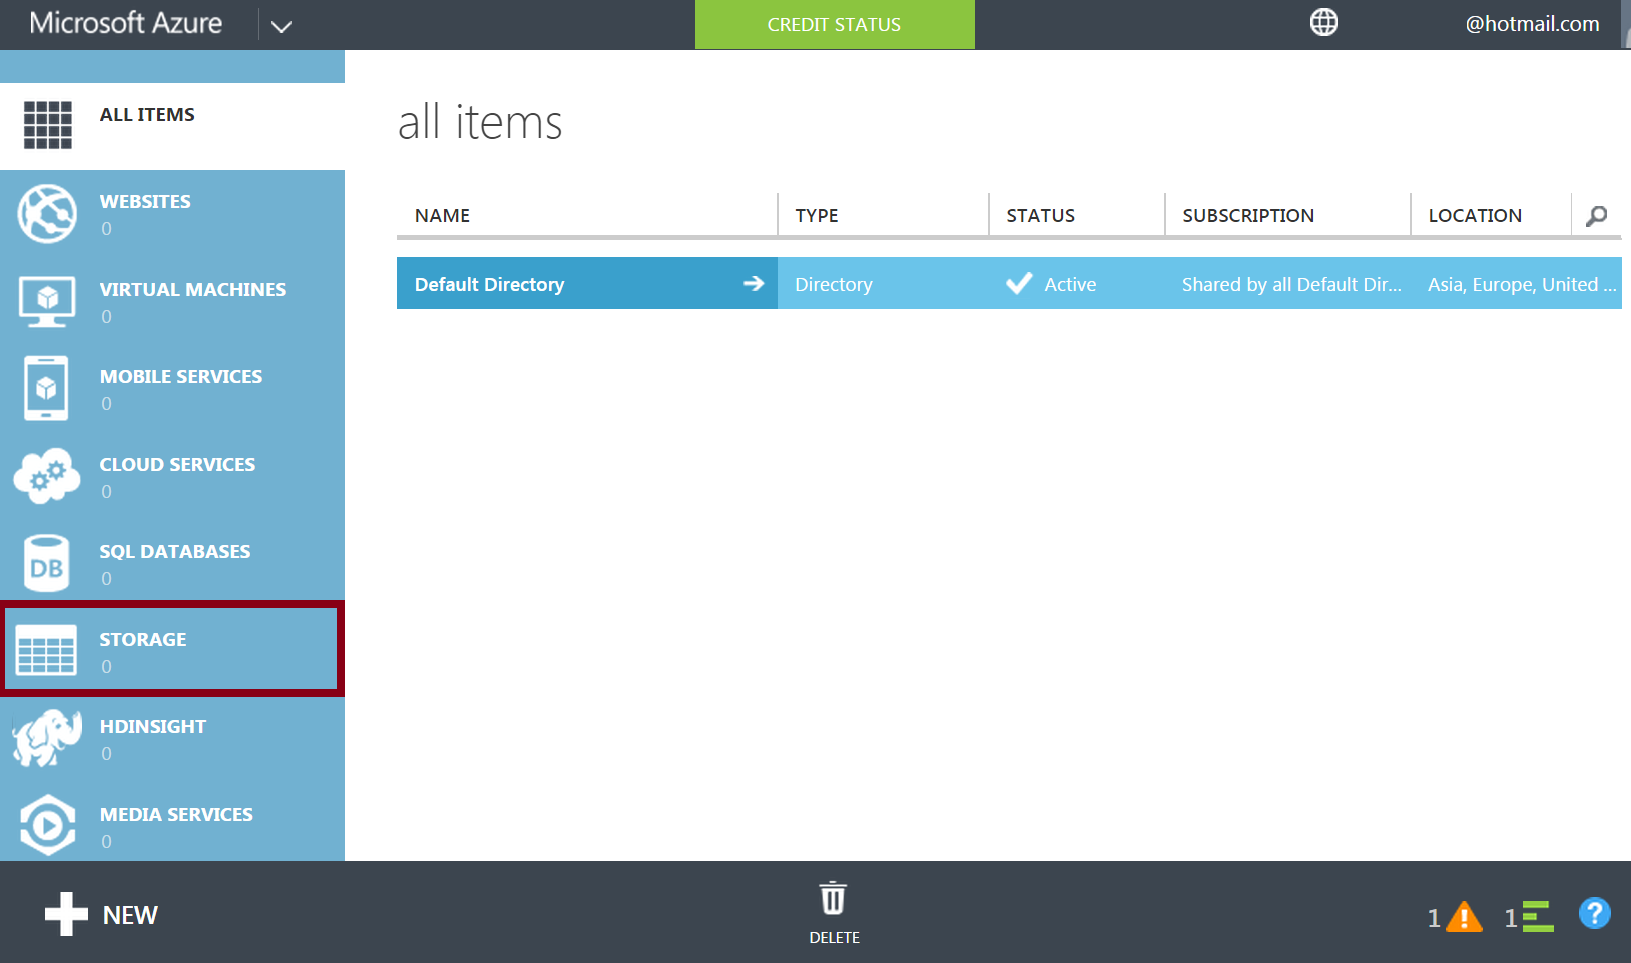
Step 2 : (Select SQL Databases)
Once you create the account and Sign in to Microsoft Azure, you will be in the Microsoft Azure portal as shown below. Here you can see a lot of different exciting features, however, you need to select SQL DATABASES from the left pane. Once selected, you will see sql databases dashboard on the right hand pane. In order to create a NEW SQL SERVER, you need to select SERVERS from top and press + button at the bottom as shown below.

Azure Create SQL Server & Database 1.1

Note : If you already have SQL Server, skip this step.

Step 3 : (Provide SQL Server Info)
Now you are in the SQL database server settings screen. Here you need to select the SUBSCRIPTION (if you have ONLY one then it will be selected by default), LOGIN NAME, PASSWORD and REGION (always select the nearest region which gives you the best performance) and press the CHECK MARK shown below.

Azure Create SQL Server & Database.1.2

Note : If you already have SQL Server, skip this step.

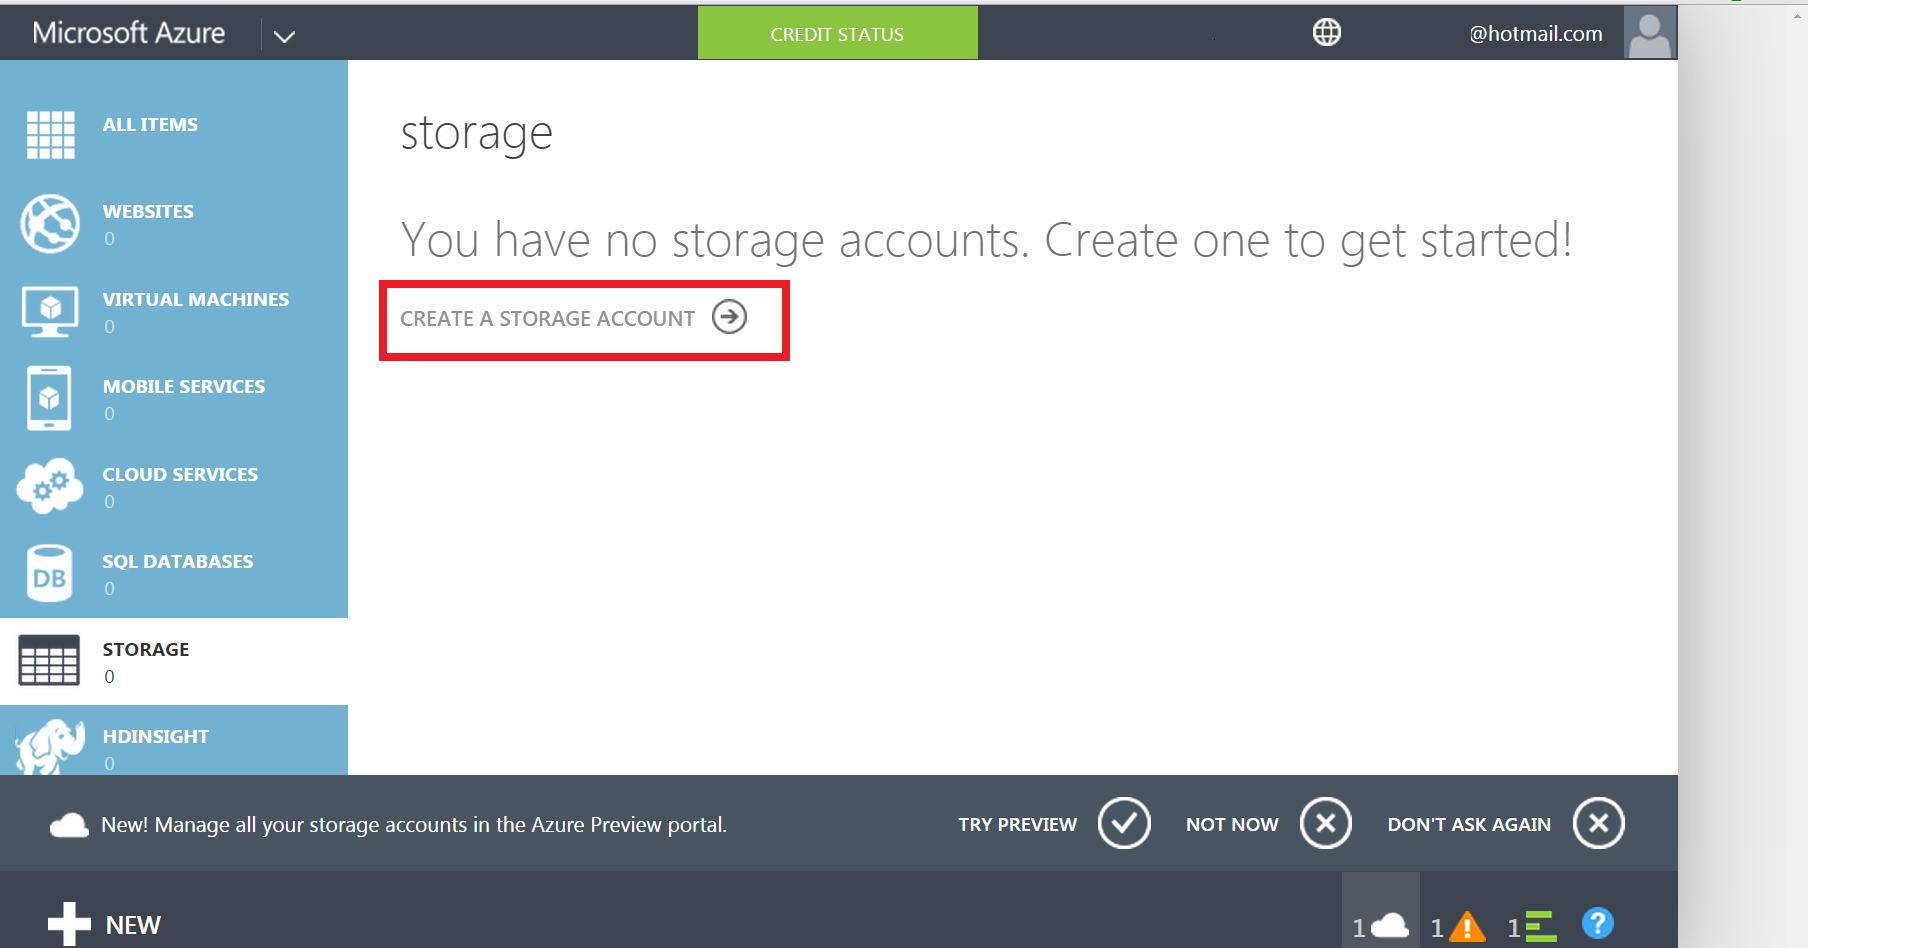
Step 4 : (SQL Server Creation)
Now, your server has been started creating and it generally takes 1-2 minutes.

Azure Create SQL Server & Database.1.3

Your server has been created as shown below.

Azure Create SQL Server & Database.1.4

Note : If you already have SQL Server in Azure account, skip this step.

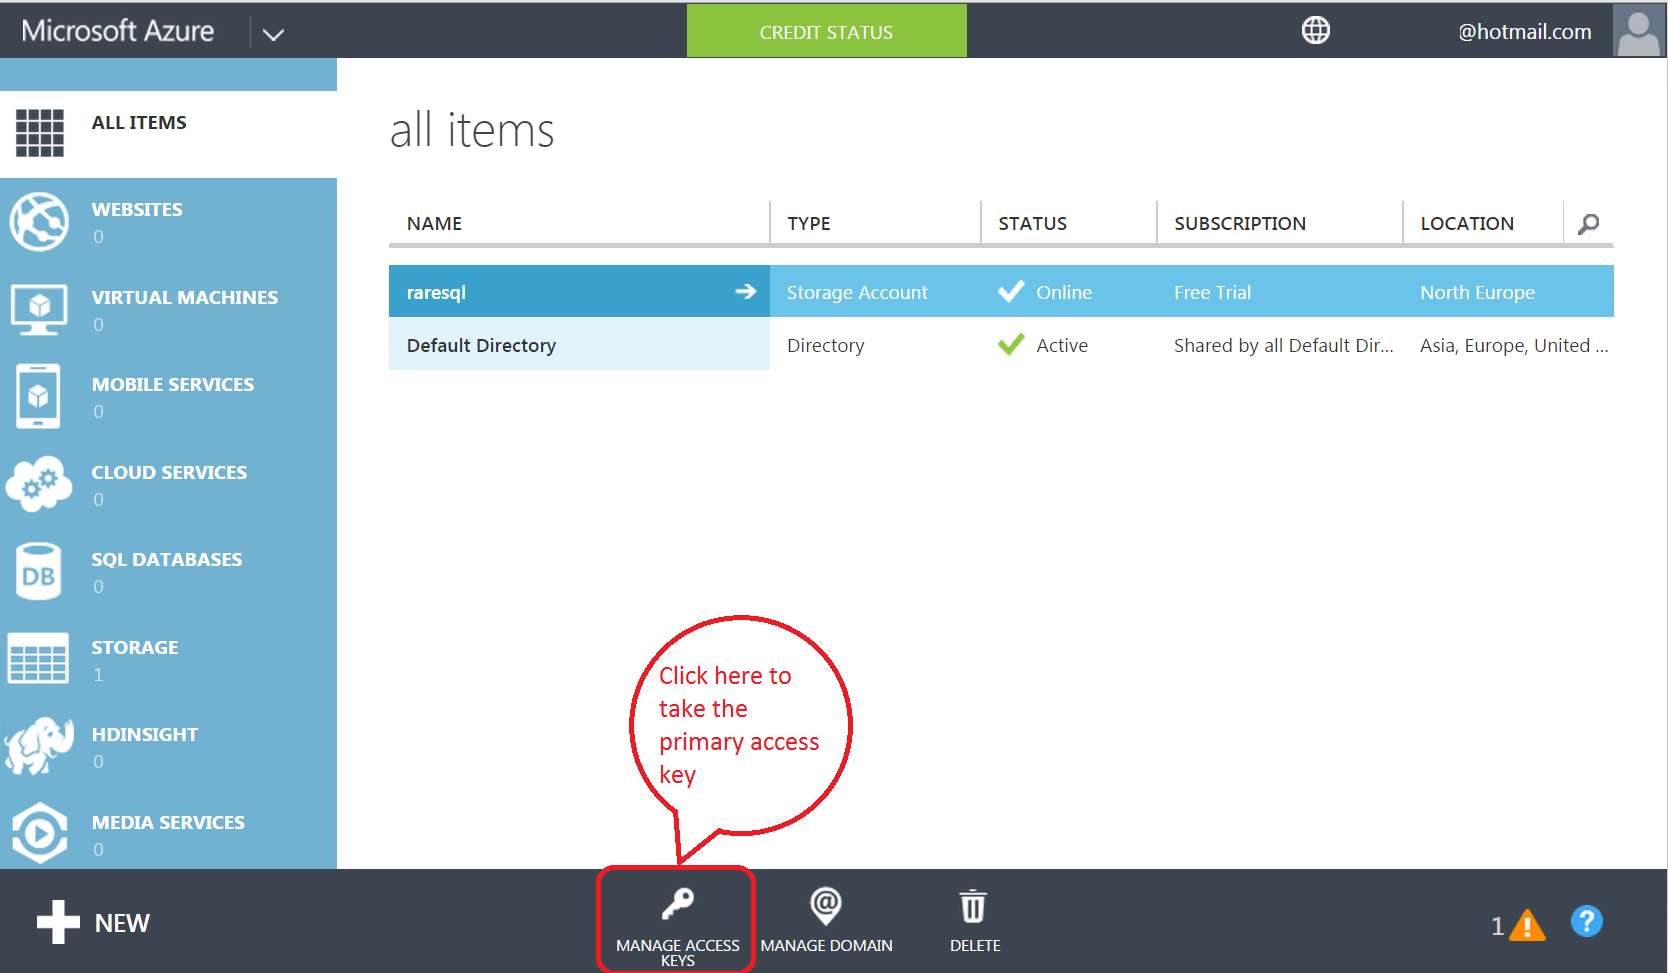
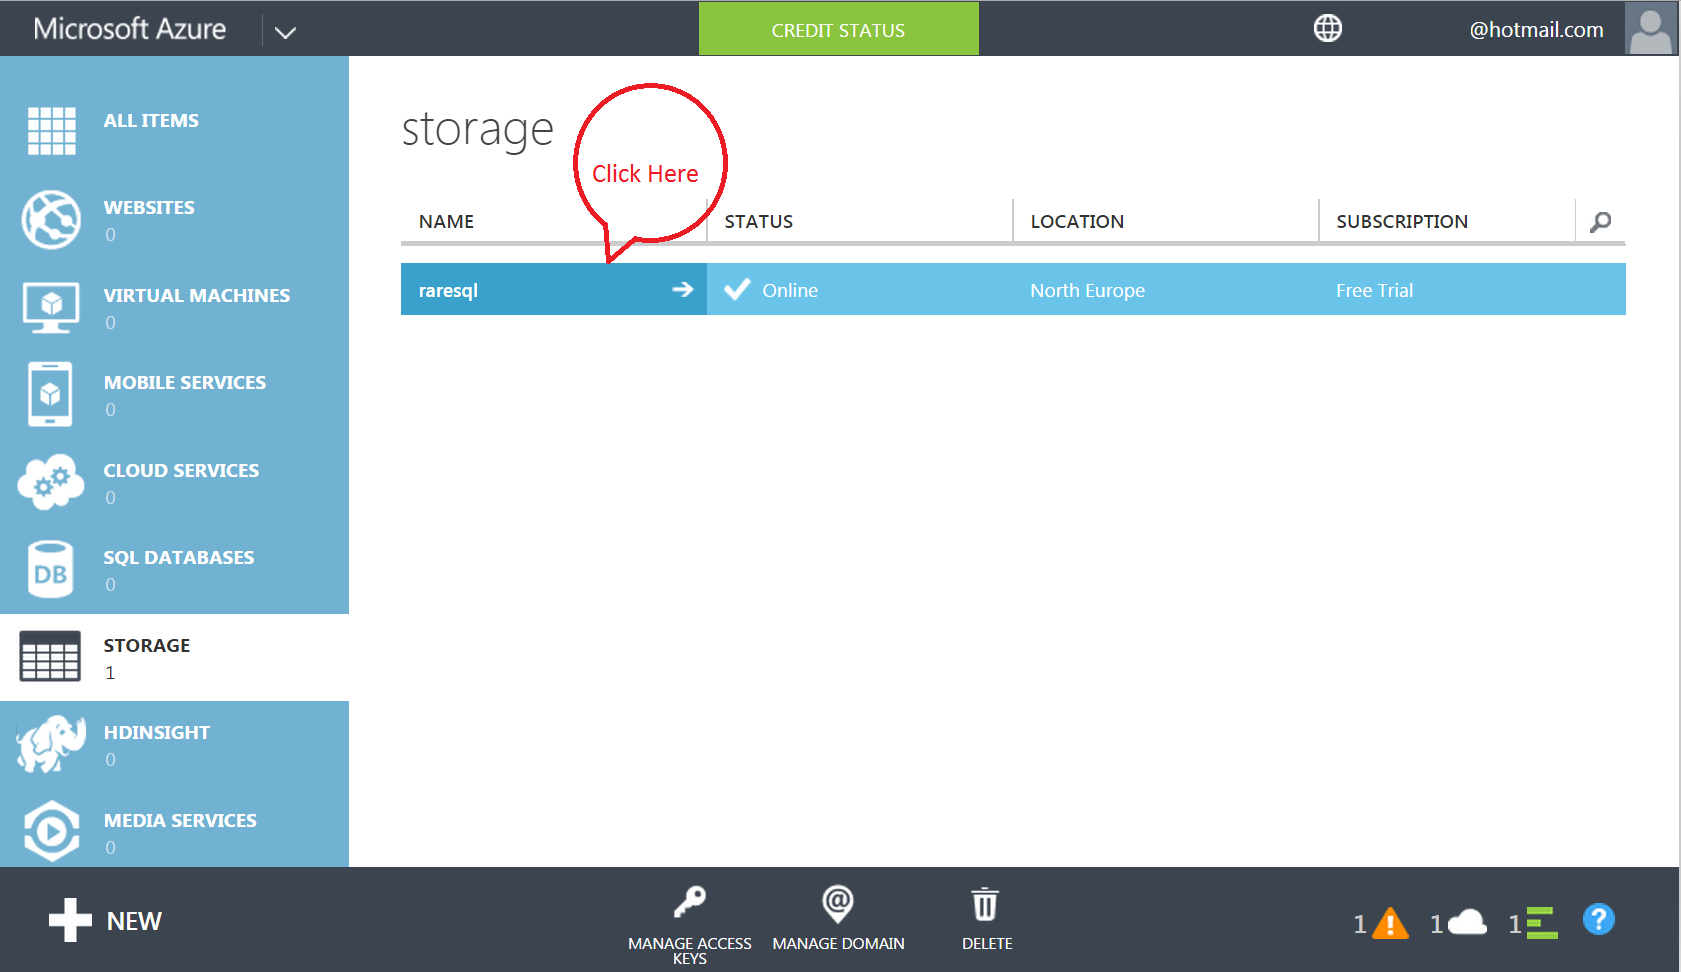
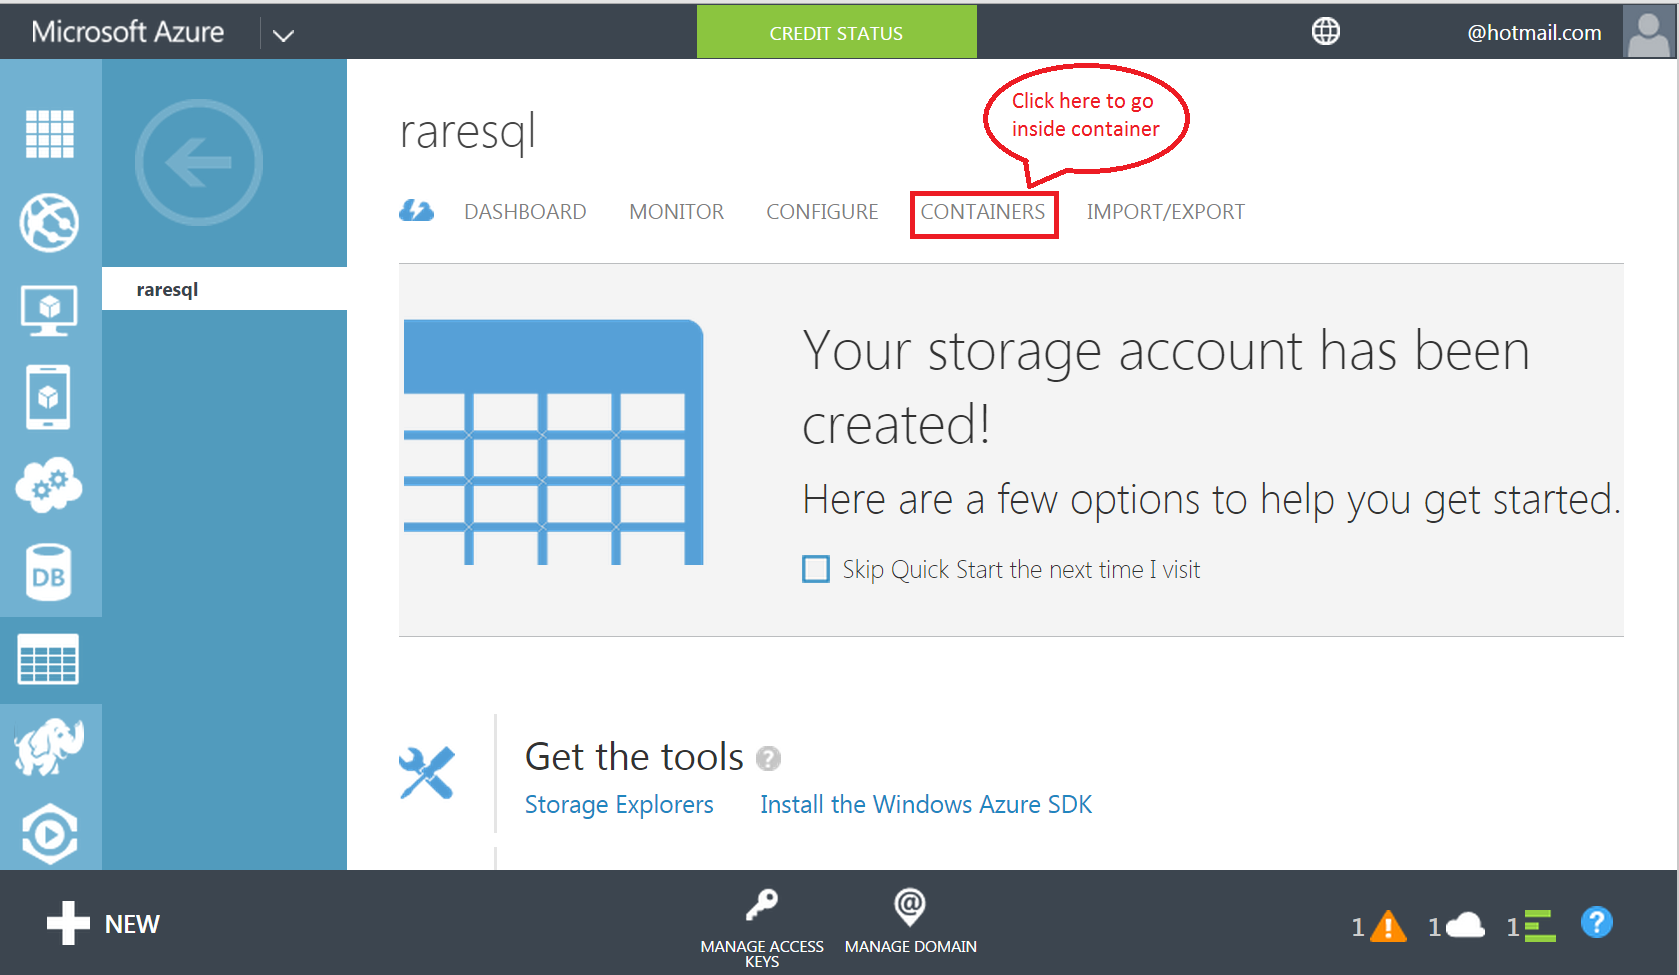
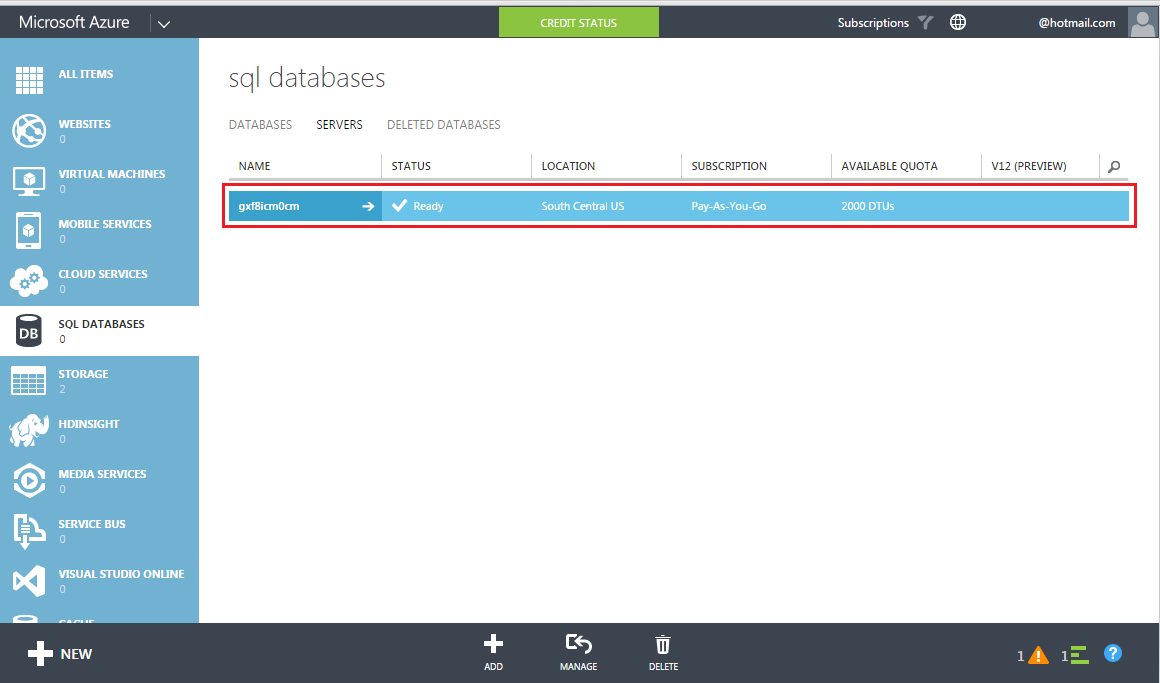
Step 5 : (Select the Server)
Now, you need to select the SQL Server you just created in the above step. (If you already have a server, you can select it). Once you selected the server, it will take you to the SQL Server dashboard. Here you need to select the Create Database as shown below.

Azure Create SQL Server & Database.1.5

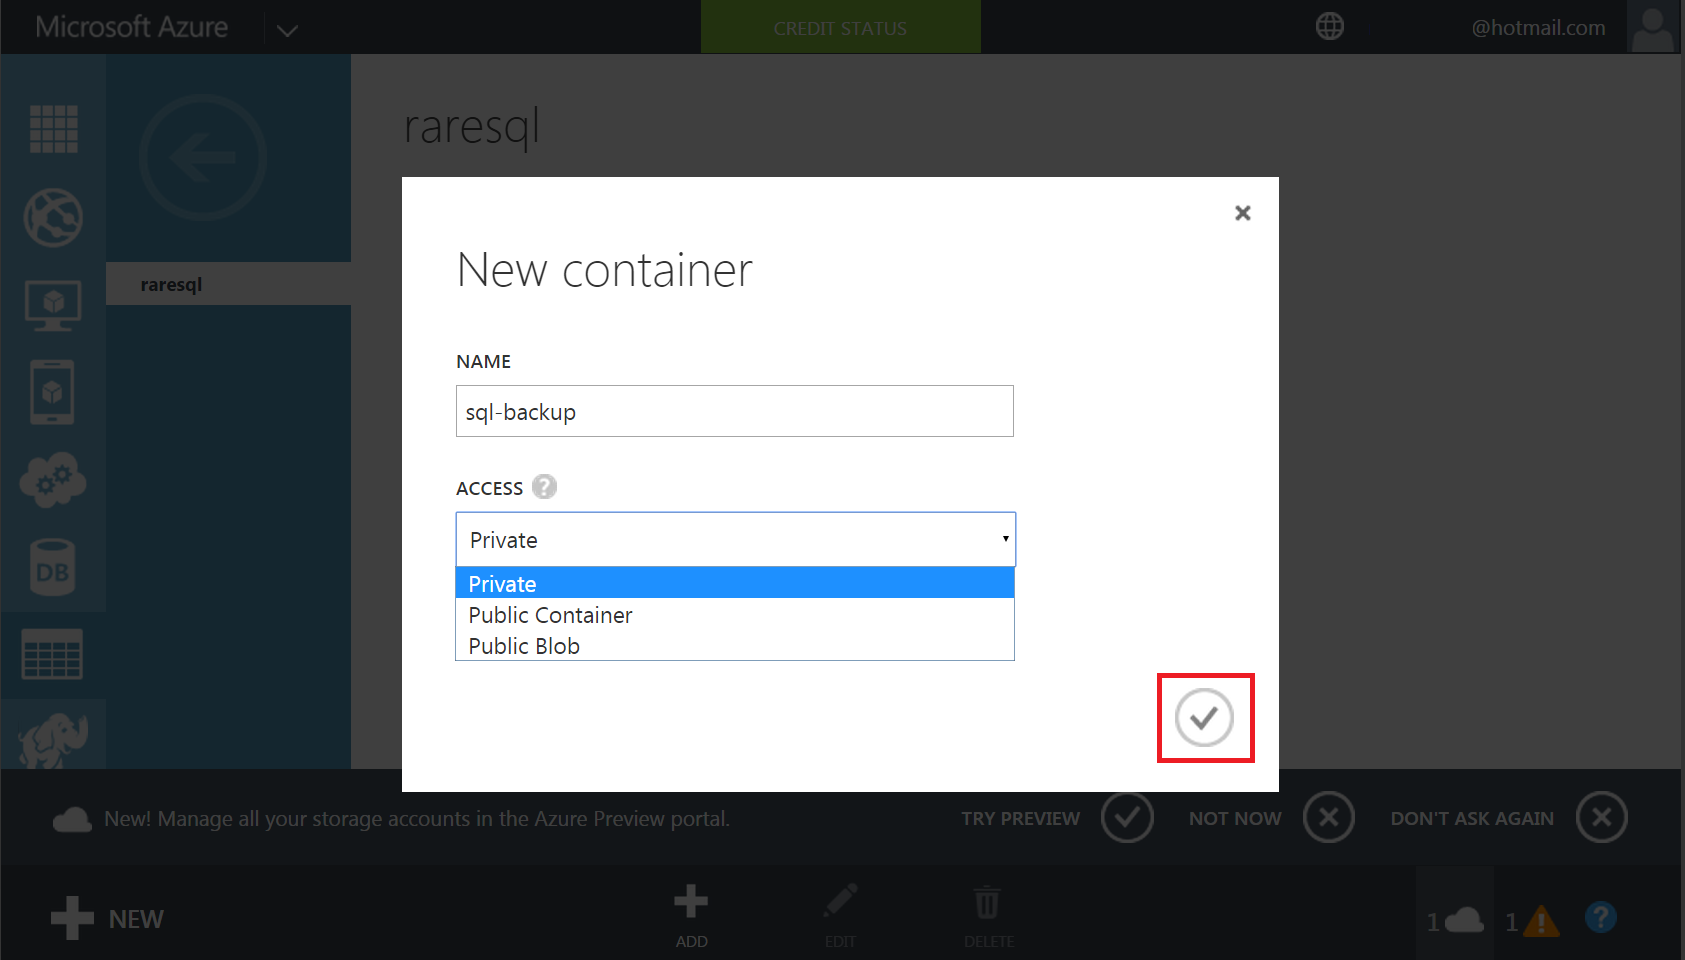
Step 6 : (Create Database)
You are now in the database creation screen, here, you need to specify database settings. You need to enter database name and choose the Service tiers, performance level, collation depending upon your requirement. Once you specify all the settings, you need to press CHECK MARK button as shown below.

Azure Create SQL Server & Database 1.6

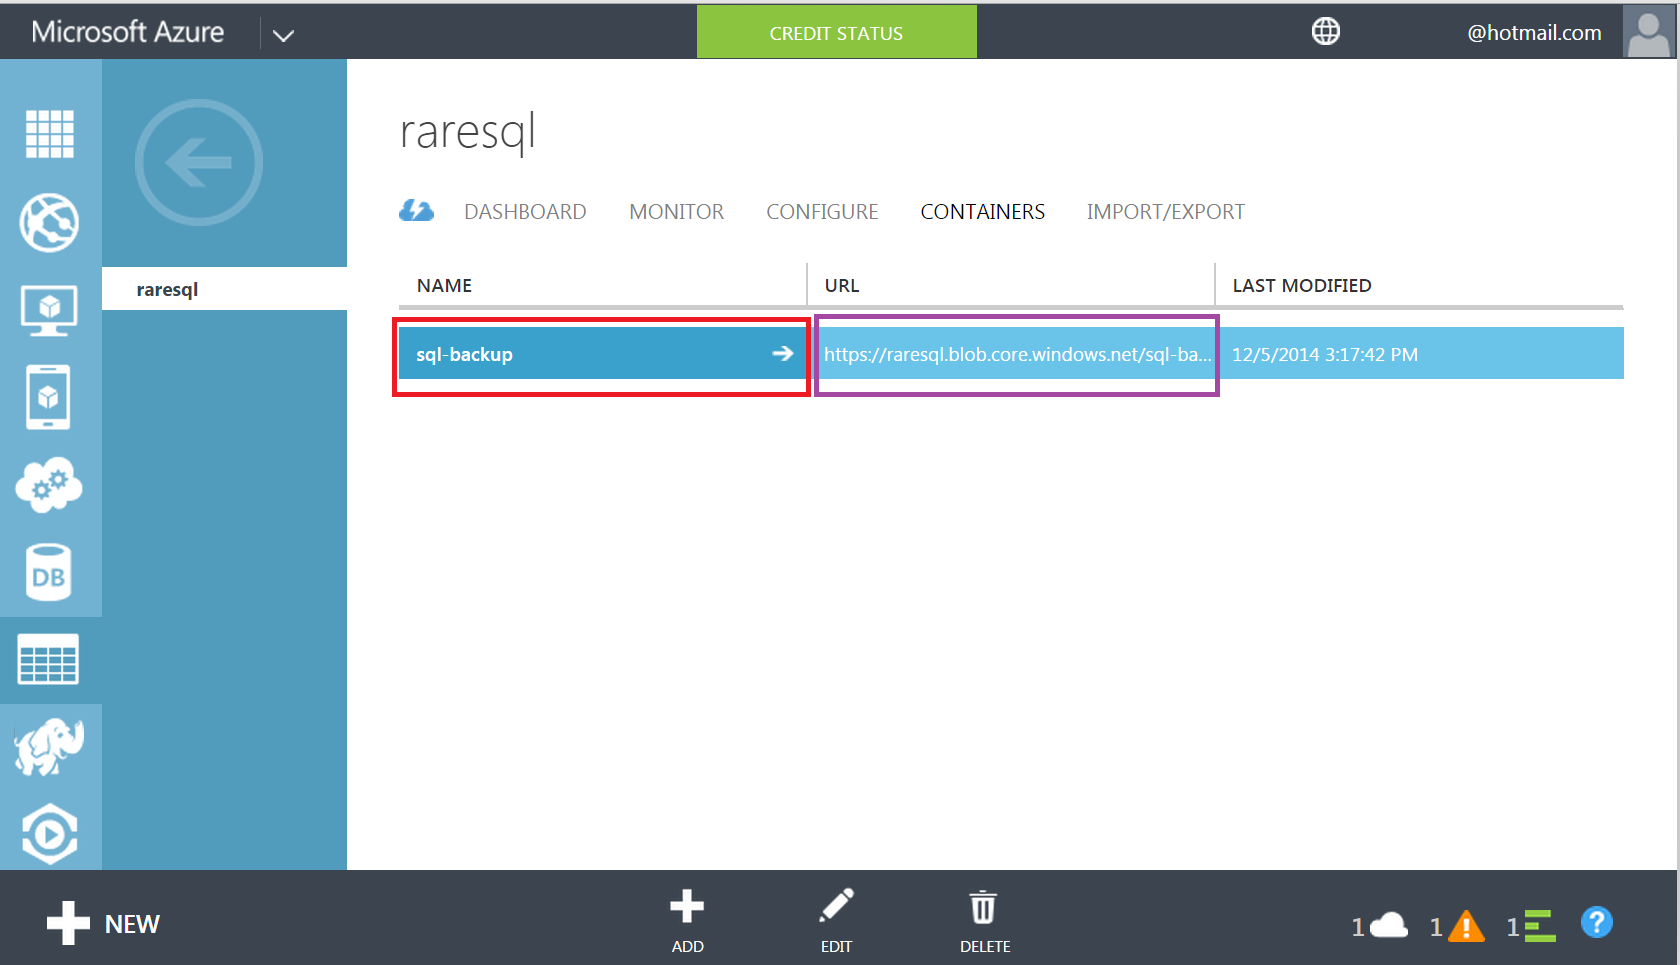
Now, your database has been created as shown below.

Azure Create SQL Server & Database 1.7

Azure Create SQL Server & Database 1.8

Let me know if you have created your first SQL Server & database in Azure and your feedback about it.

Read Full Post »

Recently, I came across a situation, where I had to place my SQL Server back on Microsoft Azure. Before placing the backup on Azure, there are some pre-requisites required, for example a valid account, a storage and a container on Azure. Given below is a step by step approach,  demonstrating how to create them using simple steps.

Step 1 :
First of all, you need to create a Microsoft Azure account (It is free for one month ONLY, however it asks the credit card details for verification ONLY).

Free tial account of Azure.1.1

Step 2 :
Once you create the account and Sign in to Microsoft Azure, you will be in the Microsoft Azure portal as shown below. Here you can see a lot of different exciting features, however, you need to select storage to create a NEW storage.

Azure Storage 1.2

Step 3 :
Now you are in the storage screen and Azure is showing that you have no storage because you have a new account, so you should create a storage as shown below. If you already have a storage you can utilize it.

create storage 1.3

Step 4 :
Once you click on the new storage account, Azure will take you to the storage creation screen and require a unique URL name that you can reference later. You should leave the remaining info as it is and click on create storage account button at the bottom as shown below. In my case I named the storage as ‘raresql‘.

create storage 1.4

Once your storage has been created, it would look like this :

create storage 1.4.1png

Step 5 :
Now, you have created the storage. The next step is to take the access keys that you require later to keep anything in this particular storage. In order to get the access keys, you need to click on the manage access keys button as shown below.

Azure Storage 1.5.2

Once you click on manage access keys, it will show the storage name, primary and secondary access keys.

Azure Storage 1.5.3

Step 6 :
The next step is to create the container, where you can keep your backups. Just click on raresql (storage)  in order to create container as shown below.

Azure Storage 1.5

Step 7 :

Once you click on the storage, it will take the storage dashboard and you will find a lot of exciting features here as well, however, you just need to select the container tab as shown below.

Azure Storage 1.5.1

Step 8 :
Once you click on the container tab, it will take you to the container creation screen as shown below. Here you need to click on create a container to proceed.

Azure Storage 1.6

Step 9 :
Once you click on create a container button, it will pop up the container creation screen. Here you need to enter the container name and its security and click the tick button at the right bottom. By default the security is private as shown below.

Azure Storage 1.7

Step 10 :
Once you click the tick, your container will be created as shown below. However, please make a note of your container name and its URL. This will help you to reference your container back.

Azure Storage 1.8

Let me know your comments if you face any problem during the creation of storage and container.

Read Full Post »